 Save
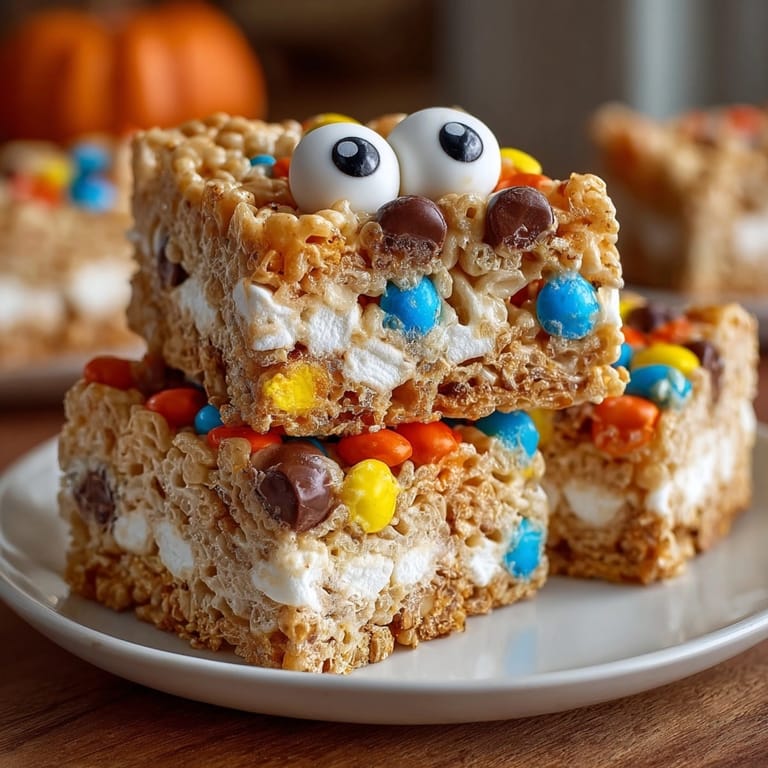
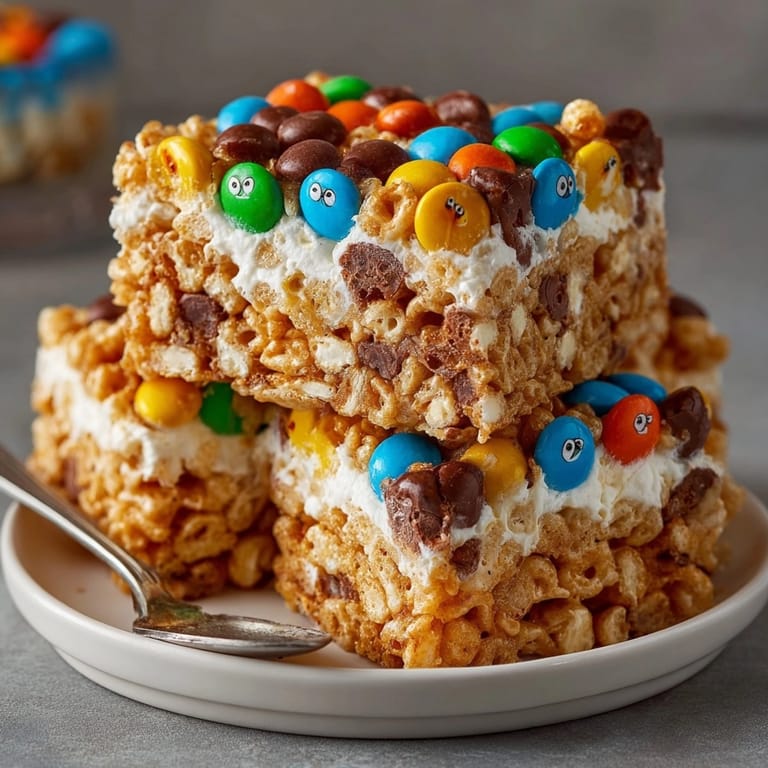
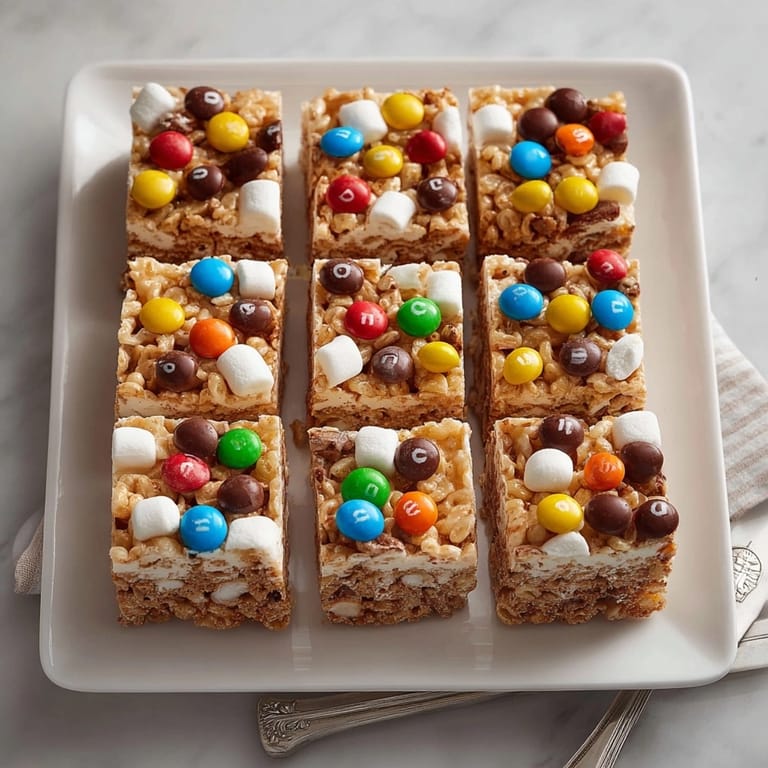
Save Monster Marshmallow Cereal Bars are my secret weapon for when the kids want something playful and sweet but I do not want to turn on the oven. These bars have a satisfyingly chewy texture thanks to gooey marshmallows, with pops of vibrant color from chocolate candies and silly candy eyes for monster fun. Perfect when you need a dessert in minutes or want a treat that stands out at parties.
I first whipped these up for a Halloween party and the whole tray vanished before I could even sit down. Now we make them for sleepovers or as lunchbox surprises. They always bring smiles and a little chaos to the kitchen.
Ingredients
- Multigrain or crispy rice cereal: gives that irresistible classic crunch and holds the bars together. Look for fresh cereal that is still crispy when squeezed slightly in the bag.
- Mini marshmallows: provide structure and gooeyness without overpowering sweetness. Fresh marshmallows melt better and create a smoother mix.
- Unsalted butter: delivers richness and helps the marshmallows melt evenly. I like to use European style butter for extra flavor.
- Vanilla extract: rounds out flavors so the sweetness feels balanced. Pure vanilla works best for this.
- Colorful candy coated chocolates: bring vibrant color and chocolate bursts. Choose chocolates with bright shells and look for peanut free labeling if needed.
- Mini chocolate chips: add extra meltiness and decadence. Use high quality chips for best results.
- Candy eyes: make the bars playful and perfect for parties. Check labels to ensure freshness and clear shapes.
Tired of Takeout? 🥡
Get 10 meals you can make faster than delivery arrives. Seriously.
One email. No spam. Unsubscribe anytime.
Instructions
- Prepare The Pan:
- Lightly grease a nine by thirteen inch baking pan or line it with parchment paper. Make sure corners are coated so the bars will not stick later.
- Melt The Butter And Marshmallows:
- In a large heavy bottomed saucepan over medium low heat melt the butter until foamy. Add the mini marshmallows and stir constantly using a silicone spatula until fully melted and smooth. This may take about three to five minutes. Take the pot off the heat and immediately mix in pure vanilla extract.
- Combine With Cereal:
- Pour all the cereal into the melted marshmallow mixture and quickly fold it in. Stir gently but swiftly to coat every piece and avoid crushing the cereal.
- Mix In Half The Candy And Chocolate Chips:
- Add half the candy coated chocolates and half the mini chocolate chips to the mixture. Fold them in gently so the candies are evenly distributed without melting fully.
- Press And Shape The Bars:
- Transfer the sticky mixture to the prepared pan. Use a buttered spatula or wax paper to press the mixture down firmly and evenly. Work from corners to sides for an even slab.
- Decorate The Top:
- Sprinkle the reserved candy coated chocolates mini chocolate chips and candy eyes over the surface while still warm. Press down lightly so they adhere but do not crush the shapes.
- Cool And Cut:
- Let the bars cool completely uncovered for about thirty minutes. Once set slide a sharp knife along the edges and cut into twelve equal bars.
 Save
Save There is something magical about watching marshmallows melt down and seeing the kids giggle as they stick on the candy eyes. My favorite part is letting everyone decorate their own bar before cutting. It turns snack time into a little creative project.
Storage Tips
Once cooled cut bars keep best in a tight lidded container at room temperature for three days. If you want to stack bars layer with parchment to prevent sticking.
Ingredient Substitutions
You do not have to stick with rice cereal. Fruity cereals chocolate flavored cereals or even cornflakes all work beautifully in this recipe. White chocolate chips are good for a softer taste.
Serving Suggestions
Cut bars smaller for party favors or wrap in parchment for lunchboxes. For holidays swap colors of candies to fit the theme.
Cultural and Historical Context
Cereal bars have a strong nostalgic pop culture presence in American kitchens especially since the invention of Rice Krispies Treats in the late nineteen thirties. This monster style gives a playful twist to that classic and keeps the tradition fresh for new generations.
Seasonal Adaptations
Swap candy colors for red and green for winter parties, purple and orange for Halloween, pastels for springtime brunches.
Success Stories
The first time I made these the bars disappeared in less than an hour at a family reunion. My niece insisted on adding extra candy eyes and now it is our little tradition to make the bars as wacky as possible. They bring out everyone’s silly side.
Freezer Meal Conversion
You can freeze the uncut slab tightly wrapped in plastic. Thaw at room temperature then slice into bars for a quick sweet treat whenever you need.
 Save
Save Monster Marshmallow Cereal Bars turn any ordinary day into a silly treat. With playful colors and chewy texture, these party bars are sure to bring smiles.
Recipe FAQ
- → Can I use different cereals for these bars?
Yes, you can substitute with cornflakes, puffed rice, or your favorite crispy cereal for unique flavor and texture.
- → How do I keep the bars from sticking to the pan?
Lightly grease the pan or line it with parchment paper before pressing the mixture in to ensure easy removal.
- → Are candy eyes necessary for the monster effect?
Candy eyes add a fun monster look, but you can skip them or substitute with mini marshmallows or chocolate chips.
- → How long do the bars stay fresh?
Store the bars in an airtight container at room temperature for up to 3 days for best freshness and texture.
- → Can I add extra chocolate drizzle on top?
Yes, drizzle melted white or dark chocolate over the bars before adding candy eyes for extra flavor and decoration.