 Save
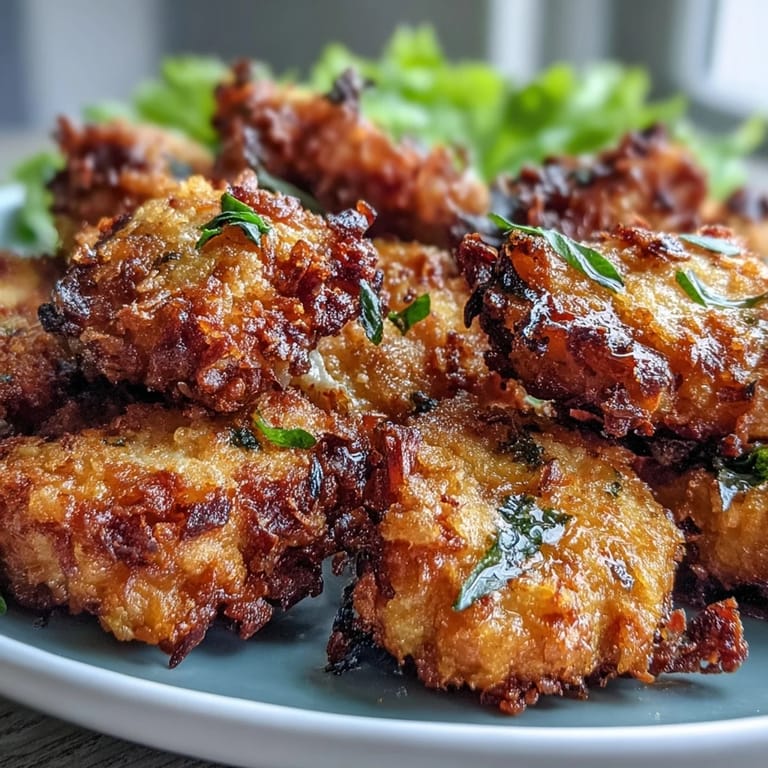
Save My neighbor showed up one afternoon with a container of these golden, crispy chicken bites, and I immediately understood why her kids devoured them so quickly. She'd discovered the magic of combining Asiago cheese with panko—a combination that sounded simple but tasted impossibly addictive. The cheese doesn't just coat the chicken; it melts slightly and creates these almost caramelized pockets of flavor that make you reach for another one before the first has even cooled. I asked for her method, tweaked it slightly after my first attempt, and now this is what I make whenever I need something that feels impressive but requires almost no stress.
I made these for a work potluck last fall, and they were gone within minutes while other dishes sat untouched—not to brag, but I've never seen someone eat four of these in a row without stopping. My coworker Sarah came back to the table asking for the recipe, convinced they were fried because she couldn't believe something baked could be that satisfying. That moment taught me that sometimes the simplest dishes hit harder than complicated ones, especially when you nail the coating texture.
Ingredients
- Boneless, skinless chicken breasts or thighs (500 g / 1 lb), cut into 2.5 cm chunks: Thighs stay juicier than breasts, but either works—the key is cutting them uniform so they cook evenly.
- Panko breadcrumbs (100 g / 1 cup): These larger, crispier crumbs are what make the texture so satisfying compared to regular breadcrumbs.
- Finely grated Asiago cheese (60 g / 2/3 cup): Don't use pre-shredded if you can avoid it—fresh grated melts and browns more beautifully, and you'll taste the difference.
- Garlic powder (1 tsp), paprika (1/2 tsp), salt (1/2 tsp), and freshly ground black pepper (1/4 tsp): These seasonings live in the breading where they build flavor with every bite.
- Large eggs (2) and milk (2 tbsp): The egg mixture acts as your glue; the milk keeps it from being too thick so it coats evenly without clumping.
- Cooking spray or olive oil: A light spray on top before baking is what transforms these from ordinary to genuinely crispy.
Tired of Takeout? 🥡
Get 10 meals you can make faster than delivery arrives. Seriously.
One email. No spam. Unsubscribe anytime.
Instructions
- Preheat and prepare:
- Set your oven to 220°C (425°F) and line a baking sheet with parchment paper, then give it a light coating of spray or oil—this prevents sticking and helps the bottoms crisp up. You're essentially creating a non-stick surface that lets heat circulate freely around each piece.
- Mix your wet base:
- Whisk the eggs and milk together in a shallow bowl until they're fully combined and slightly frothy. This is your coating glue, so don't skip whisking—it helps the breadcrumb mixture adhere evenly instead of falling off in patches.
- Combine the dry coating:
- In another shallow bowl, toss together the panko, Asiago cheese, garlic powder, paprika, salt, and pepper until everything is distributed evenly. Taste a tiny pinch to check the seasoning—it should smell savory and slightly sharp from the cheese.
- Coat each piece:
- Dip each chicken chunk into the egg mixture, letting excess drip away, then roll it thoroughly in the Asiago-panko mixture and press gently so the coating clings. Don't be timid here; press with your fingers to make sure the coating sticks, because loose breading falls off during baking.
- Arrange on the sheet:
- Spread the coated pieces across your prepared baking sheet, leaving space between each one so hot air can reach all sides. A crowded sheet creates steam instead of crispiness, so resist the urge to pack them in tightly.
- Final spray and bake:
- Give the tops a light spray of cooking spray or drizzle of olive oil, then slide them into your preheated oven for 18–20 minutes, turning them halfway through with tongs. They're done when golden brown on all sides and the internal temperature hits 74°C (165°F).
- Cool and serve:
- Let them rest for a few minutes on the sheet before moving them—this allows the coating to set slightly so it doesn't slide off. Serve them warm with marinara, ranch, honey mustard, or straight from the sheet if you can't wait.
 Save
Save These chicken bites have become my go-to when friends drop by unannounced because they're ready in forty minutes and always make the place smell like something special just happened in the kitchen. There's something about serving food that looks intentional and tastes better than expected that makes people feel genuinely welcomed.
Why Asiago and Panko Are a Perfect Match
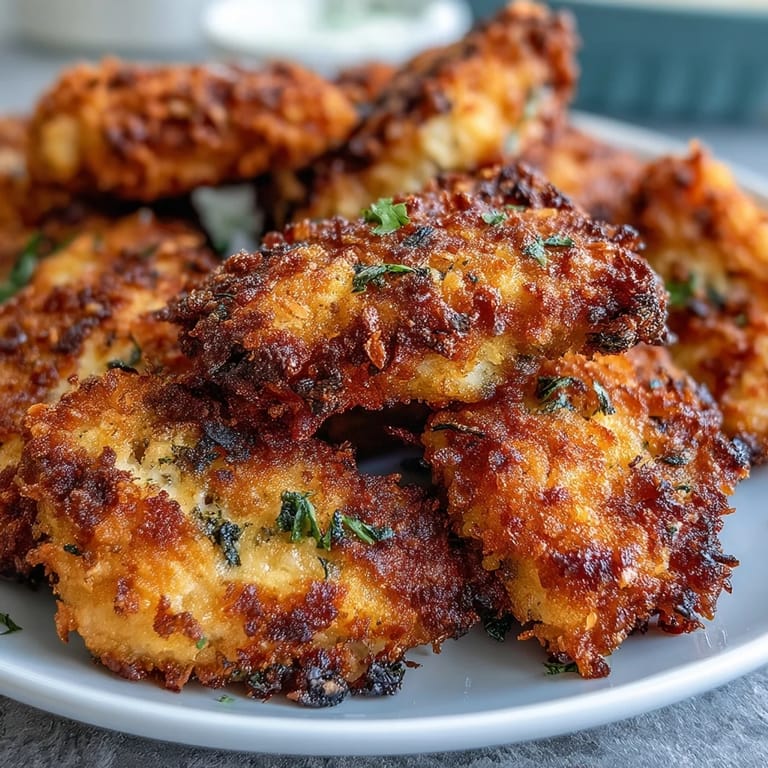
Most cheese breading recipes use Parmesan because it's predictable, but Asiago has a slightly nuttier, richer flavor that intensifies when it browns. The panko's large crumbs give the cheese room to crisp up and caramelize rather than flatten into a dense, greasy coating. Together they create this textural contrast—crispy exterior, tender chicken inside—that feels more sophisticated than it has any right to be given how simple it is to make.
Baking Versus Air-Frying
The oven method works beautifully and requires almost no monitoring, but if you own an air fryer, these bites hit an entirely different level of crispy in just 12–14 minutes at 200°C (400°F). Air-frying concentrates the heat in a way that browns the cheese even more aggressively, creating darker, crunchier spots that are honestly addictive. The trade-off is capacity—you can only fit about half the batch at a time—but if you're making these for just yourself or a couple of people, the air fryer is genuinely superior.
Making Them Your Own
The base recipe is seasoning-agnostic, which means you can push it in different directions depending on your mood. I've added Italian seasoning for an herb-forward version, swapped in smoked paprika for depth, and even mixed in a pinch of cayenne when I wanted heat. The beauty is that the Asiago and panko foundation is strong enough to handle experimentation without falling apart.
- Try mixing in a small handful of finely chopped fresh herbs like parsley or thyme directly into the panko mixture for brightness.
- If you prefer a Mediterranean angle, dust the finished bites with a tiny pinch of finely grated lemon zest right after they come out of the oven.
- These can be made ahead and reheated in a 160°C (320°F) oven for about five minutes if you need to prepare them earlier in the day.
 Save
Save These bites prove that weeknight cooking doesn't have to be complicated to taste genuinely good. Make them once, and they'll become a regular in your rotation.
Recipe FAQ
- → Can I make these chicken bites ahead of time?
Yes, you can bread the chicken pieces up to 24 hours in advance. Store them covered in the refrigerator on a parchment-lined baking sheet. When ready to bake, add 2-3 minutes to the cooking time since they'll be cold. For maximum freshness, bake within 24 hours of breading.
- → What's the best way to reheat leftover bites?
Reheat in a 200°C (400°F) oven for 8-10 minutes until hot and crispy again. Avoid microwaving, which makes them soggy. You can also reheat in an air fryer at 200°C (400°F) for 4-5 minutes. The oven method restores the most crunch.
- → Can I use chicken thighs instead of breasts?
Absolutely. Chicken thighs will be juicier and slightly more forgiving due to their higher fat content. They may take an extra 2-3 minutes to cook through. Cut thighs into similar 2.5 cm chunks for even cooking. The dark meat pairs beautifully with the rich Asiago coating.
- → What dipping sauces work best with these bites?
Classic options include marinara sauce, ranch dressing, or honey mustard for sweetness. Garlic aioli, spicy sriracha mayo, or a creamy basil pesto dip also complement the savory Asiago flavor. A lemon-herb yogurt sauce adds brightness, while barbecue sauce provides a smoky contrast.
- → How do I know when the chicken is fully cooked?
The most accurate method is using a meat thermometer to check that the internal temperature reaches 74°C (165°F). Visually, the coating should be golden brown and the chicken should feel firm when pressed. If you cut into a piece, the juices should run clear and the meat should be opaque throughout, not pink.
- → Can I freeze uncooked breaded chicken bites?
Yes, arrange the breaded pieces on a baking sheet and freeze until solid, about 2 hours. Transfer to a freezer-safe bag and store for up to 3 months. Bake from frozen at 220°C (425°F) for 22-25 minutes, turning halfway. No need to thaw first.