 Save
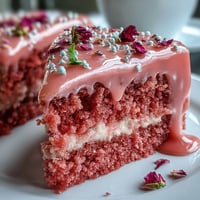
Save There's something magical about watching a cake transform into a gradient of pastels, layer by layer. My neighbor brought one to a spring brunch last April, and honestly, I was too mesmerized by the soft pink-to-yellow ombre to eat it immediately. When she finally sliced into it and I tasted that tender crumb with silky buttercream, I understood why she'd spent the afternoon carefully tinting and layering. It became my mission to master it, and now this cake is my go-to for anyone celebrating something worth making beautiful.
I made this for my daughter's baby shower on a Saturday morning, and watching guests gasp when I carried it out felt like the best kitchen win ever. One friend asked if I'd hired a pastry chef, and I couldn't stop grinning as I explained how I'd actually made it myself. That moment cemented it for me—this cake isn't just pretty, it carries real joy and accomplishment with every slice.
Ingredients
- All-purpose flour (3 cups): The backbone of a tender crumb, so don't skip the sifting step if your flour has been sitting in the pantry.
- Baking powder (2½ tsp): This is what lifts the cake and keeps it feathery, not dense.
- Unsalted butter (1 cup plus 1½ cups for frosting): Room temperature butter is essential for creaming—it's worth pulling it out 30 minutes early.
- Granulated sugar (2 cups): Don't substitute with powdered sugar here; you need the texture that creaming creates.
- Eggs (4 large): Room temperature eggs blend smoothly and incorporate air more easily.
- Whole milk (1 cup): The moisture that keeps every bite tender and prevents any dryness.
- Pure vanilla extract (1 tbsp plus 2 tsp): Real vanilla makes a noticeable difference in flavor depth.
- Gel food coloring (pink and yellow): Gel coloring won't water down your batter like liquid dyes, and the pastels look so soft.
- Powdered sugar (5 cups): Sift it before measuring or you'll end up with gritty frosting.
- Salt (pinch plus ½ tsp): A tiny pinch brightens the frosting and balances sweetness.
Tired of Takeout? 🥡
Get 10 meals you can make faster than delivery arrives. Seriously.
One email. No spam. Unsubscribe anytime.
Instructions
- Set up your workspace:
- Preheat the oven to 350°F and grease three 8-inch round pans with a light hand, then line the bottoms with parchment. Having everything ready means you won't scramble when the batter is mixed and waiting.
- Combine dry ingredients:
- Whisk flour, baking powder, and salt together in a medium bowl until they're fully combined and aerated. This distributes the leavening evenly so you get an even rise across all three cakes.
- Cream butter and sugar:
- Beat softened butter and sugar on medium speed for 3 to 4 minutes until the mixture turns light, fluffy, and pale—you're incorporating air that lifts the cake. Stop occasionally to scrape down the bowl so nothing gets missed.
- Add eggs and vanilla:
- Drop in one egg at a time, beating after each one so it fully incorporates before the next arrives. Finish with the vanilla extract and mix until the batter looks creamy and slightly thickened.
- Alternate flour and milk:
- Add a third of the flour mixture, blend it in, then add half the milk and mix gently until combined. Continue alternating flour and milk, ending with flour, stirring only until the streaks disappear—overworking toughens the crumb.
- Tint the batter:
- Divide batter into three equal bowls and add a few drops of pink gel coloring to one bowl, yellow to the second, and leave the third plain (or add a tiny hint of both for a soft peach). Stir gently until the color is even—the pastels should look delicate, not bold.
- Bake the cakes:
- Pour each colored batter into a prepared pan and smooth the tops gently. Bake for 22 to 26 minutes until a toothpick inserted near the center comes out clean or with just a few crumbs clinging.
- Cool completely:
- Let cakes rest in their pans for 10 minutes—they'll firm up and release easily—then turn them out onto wire racks to cool all the way through. Warm cakes are too delicate to frost and will slide around.
- Make the frosting:
- Beat softened butter on medium-high speed until it's creamy and pale, then gradually add sifted powdered sugar, vanilla, salt, and 3 tablespoons of milk. Beat until fluffy and light, adding another splash of milk if it feels stiff.
- Tint the frosting:
- Divide frosting into three bowls and add tiny amounts of pink and yellow gel coloring until you have soft pastels that coordinate with your cake layers. The colors should whisper, not shout.
- Layer and frost:
- Place the yellow cake layer on your serving plate and spread it with yellow buttercream, then stack the peach or plain layer and coat it with plain frosting. Top with the pink layer and spread pink frosting over the top.
- Create the ombre:
- Use an offset spatula to frost the sides, starting with yellow at the bottom and blending upward to pink at the top, using the remaining frosting to smooth out the gradient. A bench scraper or offset spatula helps blend and smooth the colors into a seamless flow.
- Finish and chill:
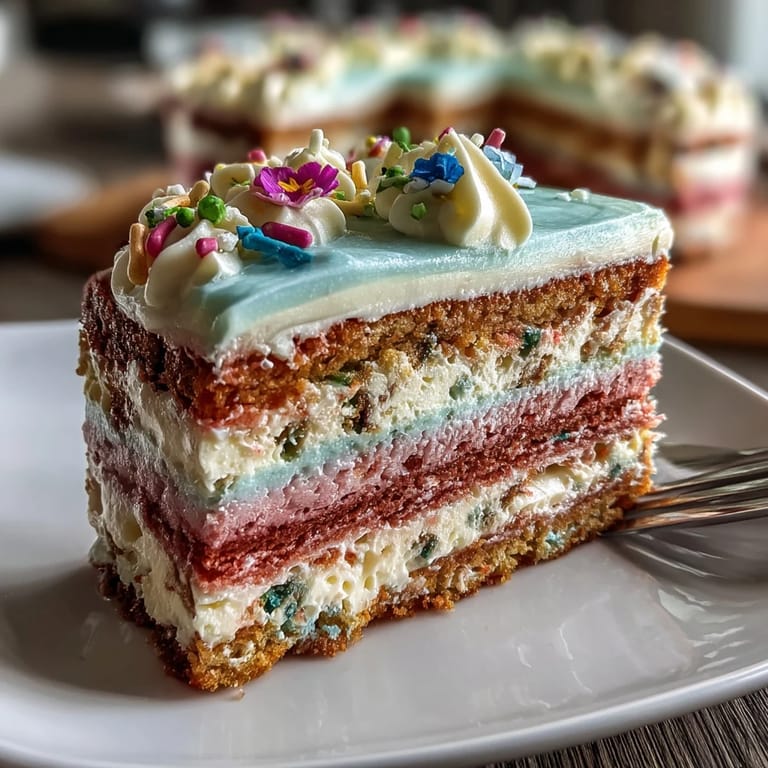
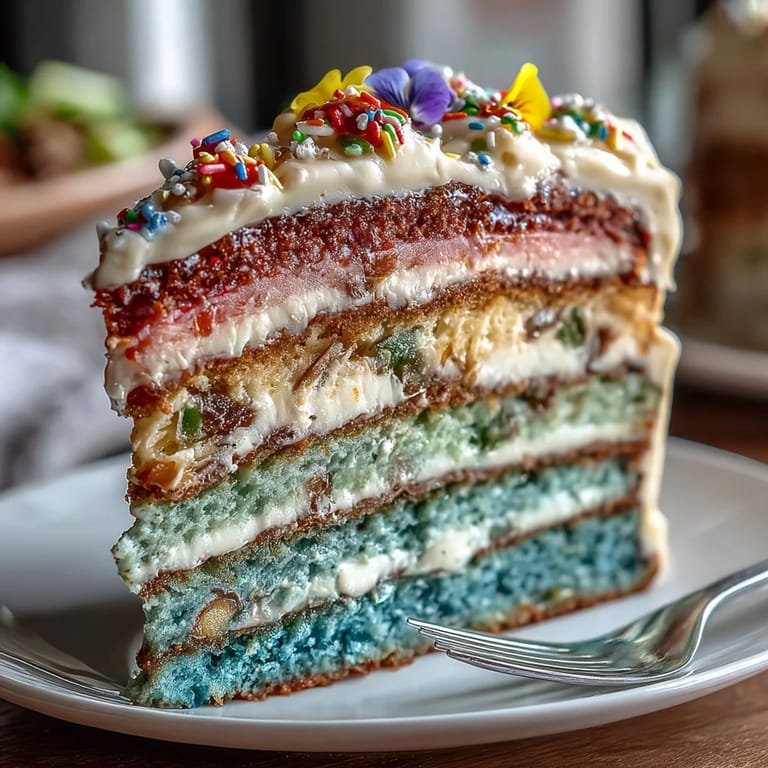
- Decorate with pastel sprinkles, edible flowers, or fresh berries if you like, then refrigerate for 30 minutes so the frosting sets and slices come out clean. A cold cake cuts like a dream.
 Save
Save One afternoon, I realized my 5-year-old had watched the entire assembly process from a stool, asking endless questions about why the colors needed to blend. When we finally served it at her school bake sale, she stood beside the table beaming as other kids lined up just to admire it before they even tasted it. That's when I knew this cake wasn't just about skill—it was about creating something beautiful enough to make people smile.
The Secret to Smooth Blending
The ombre effect stops looking amateur the moment you embrace patience during the frosting step. Work slowly and use an offset spatula or bench scraper at a slight angle, letting the colors meld where they meet rather than forcing hard lines. I used to rush this part and ended up with muddy brown patches, but once I slowed down and let the pastels dance together naturally, everything changed. Think of it like painting a watercolor where you're guiding the colors, not controlling them.
Storing Your Masterpiece
A freshly frosted ombre cake stays beautiful at room temperature for one day, which is perfect if you're serving it the same day you make it. For longer storage, wrap it loosely and refrigerate up to four days—the cold keeps the frosting firm and the colors vivid. If you need to transport it, a cake box with a cardboard layer between your serving plate and the box prevents sliding, and keeping it cool during travel ensures the frosting stays put.
Flavor Pairings and Occasions
This cake isn't just spring aesthetics—the tender crumb and silky frosting make it feel like a celebration in every bite. It pairs beautifully with a glass of Moscato or sparkling lemonade, and the soft pastels make it perfect for baby showers, bridal events, or anyone's special day when you want something that tastes as good as it looks. I've also served it alongside fresh berries and whipped cream, which adds freshness without overwhelming the delicate flavors.
- For a tangier cake, swap the whole milk for buttermilk in the same amount.
- Use more gel coloring if you prefer a bolder ombre effect instead of soft pastels.
- Make sure your cake pans are level before pouring batter so all three layers bake evenly.
 Save
Save This cake proves that beautiful baking is entirely within reach when you trust the process and take your time with the details. Make it once, and you'll want to master it again and again.
Recipe FAQ
- → How do I achieve the pastel ombre effect?
Divide the batter into three portions and tint each with different amounts of pink and yellow gel food coloring to get pale pastel shades before baking.
- → What is the best way to layer and frost the cake?
Apply colored buttercream between layers matching their respective cake layers, then blend frosting on the sides from yellow at the base to pink at the top for a smooth gradient.
- → Can I substitute buttermilk in this preparation?
Yes, using buttermilk instead of whole milk adds a tangy flavor and can enhance the texture of the sponge.
- → How long should I chill the cake before slicing?
Chill the cake for about 30 minutes to allow the frosting to set and make cleaner slices.
- → What tools help achieve a smooth buttercream finish?
An offset spatula and cake scraper are ideal for smoothing and blending the buttercream layers evenly.
- → What allergens are present in this dish?
Contains wheat (gluten), eggs, and dairy, such as butter and milk. Always check food coloring labels for additional allergens.