 Save
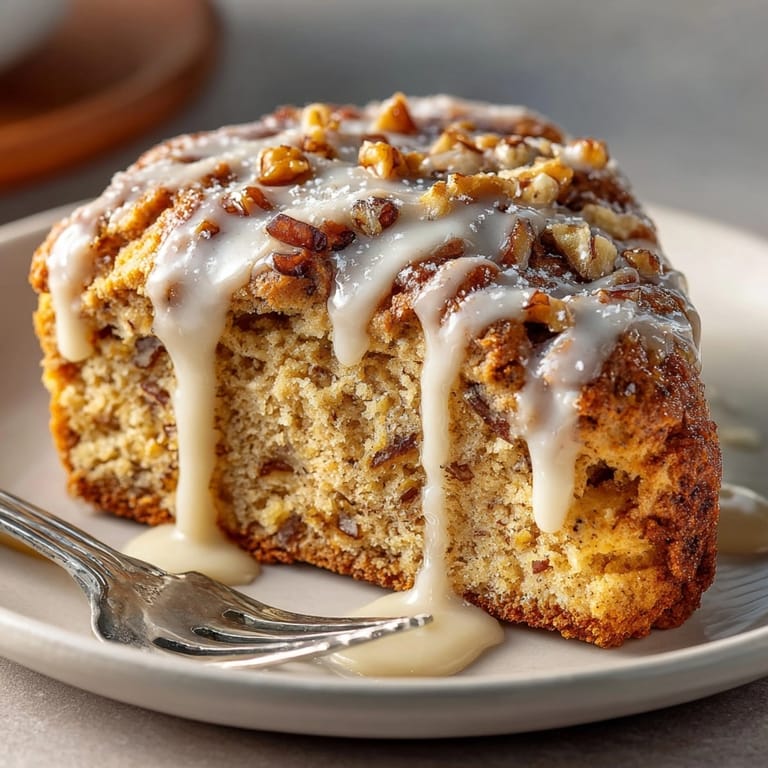
Save Imagine a batch of Maple Walnut Scones cooling on your counter, their golden tops kissed with a gentle, spiced glaze that tastes like autumn in every bite. This recipe transforms everyday baking into a cozy celebration with buttery layers, the rich sweetness of maple, and the satisfying crunch of walnuts, plus a cinnamon icing that brings it all together. These scones are a go-to breakfast or an afternoon pick-me-up when you want something homemade, warm, and a little special.
The first time I made these, my kitchen filled with the smell of maple and cinnamon and my partner came in just to ask what was baking. These never last long when friends pop by or when we want a little comfort with coffee after a long week.
Ingredients
- All-purpose flour: gives your scones that classic tender structure and chewy base go for unbleached if you can
- Granulated sugar: just enough to sweeten the dough without making it cake-like use superfine if you like delicate texture
- Baking powder: ensures tall flaky layers and good lift check the date for maximum rise
- Salt: brings out the flavors and keeps sweetness in balance a little makes a big difference
- Cold unsalted butter: key for flakiness cut into cubes straight from the fridge for the best texture
- Chopped walnuts: add crunch and nutty depth toast them for even more flavor choose fresh nuts and avoid any with a bitter taste
- Heavy cream: creates rich moisture and helps the scones brown choose a high-fat cream for the ultimate tender crumb
- Pure maple syrup: adds warmth and cozy flavor use real maple syrup for best taste skip imitation
- Large egg: binds the dough together and adds structure fresher eggs make a richer dough
- Vanilla extract: rounds out the overall flavor a quality real vanilla brings out the rest
- Powdered sugar: base for the icing make sure it is sifted for a smooth glaze
- Ground cinnamon: infuses warmth and spice fresh cinnamon makes all the difference
- Milk: gives the icing just the right drizzle go with whole for a rich finish
Tired of Takeout? 🥡
Get 10 meals you can make faster than delivery arrives. Seriously.
One email. No spam. Unsubscribe anytime.
Instructions
- Preheat and Prep:
- Preheat your oven to four hundred degrees Fahrenheit or two hundred degrees Celsius then line a baking sheet with parchment paper to prevent sticking
- Mix Dry Ingredients:
- Whisk together the flour granulated sugar baking powder and salt in a large bowl blend thoroughly so the leavening and salt are distributed evenly for even rising
- Cut In Butter:
- Add cold cubed butter to your flour mixture Use a pastry blender or your fingertips to break up the butter until the mixture looks like coarse breadcrumbs This step is crucial for perfect flaky layers stay patient and do not let the butter get too warm
- Add Walnuts:
- Stir in the chopped walnuts making sure they are evenly spread throughout the crumb This gives every scone a little crunch
- Mix Wet Ingredients:
- In a separate bowl whisk the heavy cream with the maple syrup egg and vanilla extract Mix until well combined but do not overbeat as that could toughen the dough
- Combine Wet and Dry:
- Pour your wet mixture into the dry bowl and mix with a fork gently Combine only until you see no dry flour patches the dough should look shaggy Overmixing now leads to tough scones
- Shape and Cut:
- Transfer the dough to a lightly floured surface Pat it gently into a round about seven inches wide and one inch thick Take care not to knead too much which would overwork the gluten
- Slice and Arrange:
- Cut your round into eight even wedges Place each wedge onto the baking sheet with some space between each so they can rise and bake evenly
- Brush and Bake:
- Brush the tops lightly with extra cream for sheen and browning Bake for sixteen to eighteen minutes until golden on the edges and set in the center Transfer to a wire rack so the bottoms stay crisp
- Make the Icing:
- In a small bowl whisk powdered sugar cinnamon maple syrup and just enough milk to make a thick but drizzle-able glaze If it is too thick add milk drops at a time It should fall in ribbons from your spoon
- Ice the Scones:
- Drizzle the icing over barely warm scones letting it set before serving The glaze should pool slightly and cling attractively to the cracks and edges
 Save
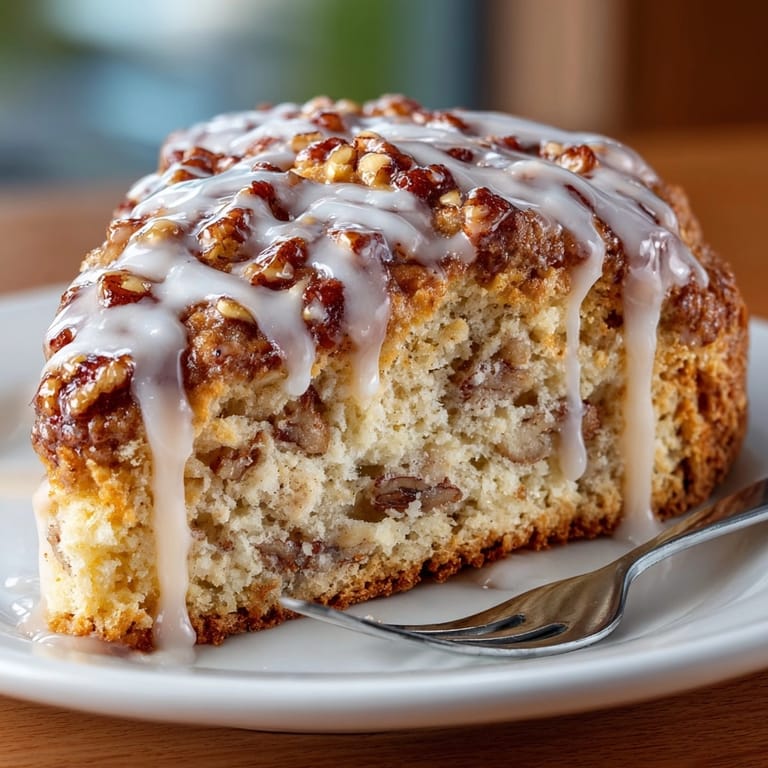
Save Maple syrup is my favorite part here because it makes the whole kitchen feel like a fall morning at a cabin My little one loves to help with the drizzle and claims the extra icing for dipping scone pieces on the weekends
Storage Tips
Keep scones at room temperature in an airtight container for up to two days and they stay delightfully soft If you want to keep them longer wrap each scone individually and freeze for up to three months To reheat microwave gently or warm in a low oven so the scones are like fresh baked again Make sure to store the icing-covered scones with parchment between layers to prevent sticking
Ingredient Substitutions
No walnuts on hand Try pecans or even hazelnuts You can use half and half instead of heavy cream if needed Gluten-free flour blends work well if you stick to a similar protein content and handle the dough gently To make them dairy free swap in plant based butter and coconut cream for great results The icing works perfectly with oat or almond milk too
Serving Suggestions
Serve these scones with a steaming mug of dark coffee or a strong black tea to balance the sweetness They make an impressive addition to an autumn brunch spread or a special homemade treat after school I also like to serve these plain or with fresh fruit if I want to lighten things up For an extra decadent breakfast split scones and sandwich with a smear of cream cheese
Cultural and Historical Context
Scones have a long tradition in British tea culture but these are a North American twist with the cozy taste of maple syrup and native nuts Maple syrup is a proud export of the US and Canada bringing a regional touch The classic scone is usually less sweet but the icing and nuts here make this recipe feel like a wonderful nod to both traditions
Seasonal Adaptations
Swap in pecans or hazelnuts for a wintery variation Add orange zest or diced apple for a fall harvest flavor Skip the icing in summer and serve them split with whipped cream and berries
Success Stories
One winter morning we made these during a snow day with the kids Rolling out and slicing the dough became an activity in itself and everyone got to drizzle their own scone These have shown up at many bake sales and family brunches always gone within the hour
Freezer Meal Conversion
To freeze unbaked scones shape them place on a tray and freeze solid then pop into a sealed bag Bake straight from frozen adding a couple extra minutes Glaze after baking for freshest results Freezing after baking works too just thaw before adding icing for best texture
 Save
Save For bakery-worthy scones at home give your dough a gentle touch and use real maple syrup. Enjoy them slightly warm for the perfect cozy treat.
Recipe FAQ
- → How do you prevent scones from becoming dry?
Use cold butter and avoid overmixing the dough. Brushing with cream before baking helps maintain moisture.
- → Can I substitute other nuts for walnuts?
Pecans or hazelnuts work well in place of walnuts, offering a different texture and flavor profile.
- → What's the secret to tender scones?
Cutting in the cold butter until the mix resembles coarse crumbs ensures a delicate and tender crumb.
- → How do you achieve the perfect glaze consistency?
Adjust milk added to sugar and cinnamon until the glaze is thick but still drizzle-able over warm scones.
- → What is the best way to serve these scones?
Serve slightly warm, freshly iced, accompanied by coffee or black tea for a cozy pairing.
- → Can I prepare scones ahead of time?
Yes, baked scones can be stored airtight for up to two days. Add glaze just before serving for freshness.