Save
Save My youngest burst into the kitchen last Tuesday announcing she had discovered the perfect use for those speckled bananas nobody wanted to touch anymore. I had been about to toss them into the compost, but her enthusiasm stopped my hand midair, and instead we mashed them into something that turned our morning routine completely around.
Last month I brought a batch to a neighborhood brunch, and my friend Sarah, who claims she hates healthy baked goods, accidentally ate three while we were all distracted catching up. She called me two days later begging for the recipe, saying her kids had requested them every morning since.
Ingredients
- 2 cups rolled oats: Old fashioned oats give the best chewy texture, but quick oats work in a pinch. Just avoid steel cut oats here as they stay too firm.
- 1/2 tsp salt: This tiny amount wakes up all the flavors and keeps the bars from tasting flat or overly sweet.
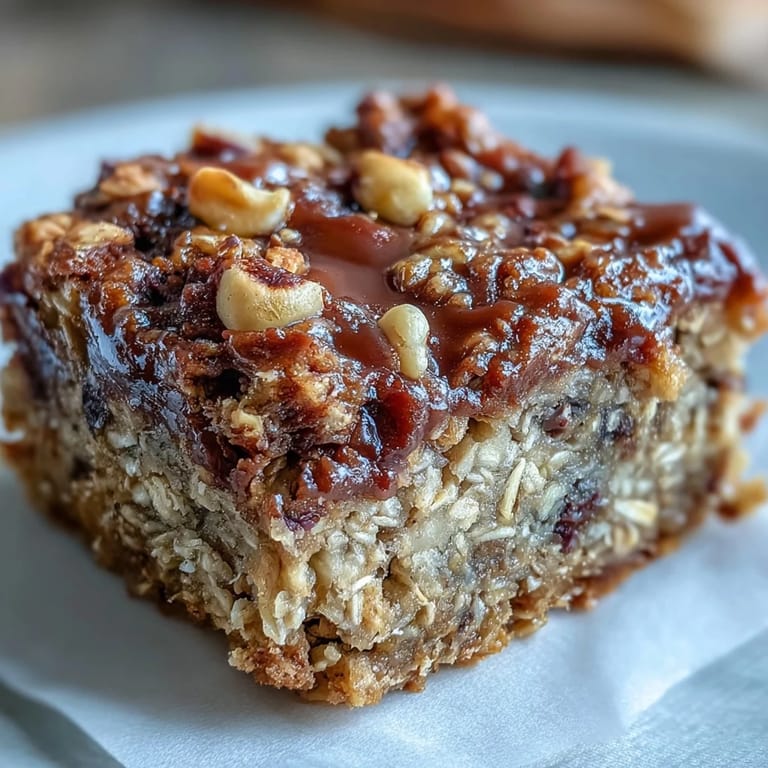
- 1 1/3 cups mashed ripe banana: About 3 medium bananas with plenty of brown spots. The specklier the banana, the sweeter and more flavorful your bars will be.
- 6 tbsp water: Helps create the right moisture level without making the batter too wet.
- 3 tbsp pure maple syrup, agave, or honey: Just enough sweetness to highlight the bananas without overwhelming them.
- 3 tbsp oil, nut butter, or additional water: Coconut oil adds subtle richness, while nut butter boosts protein. Extra water works perfectly for a lower fat version.
- 1 tsp pure vanilla extract: Do not skip this. It ties everything together and makes these taste like a special treat.
- Optional mix ins: Chocolate chips make these feel like dessert, while nuts add protein and crunch. Dried fruit works beautifully too.
Tired of Takeout? 🥡
Get 10 meals you can make faster than delivery arrives. Seriously.
One email. No spam. Unsubscribe anytime.
Instructions
- Preheat and prepare:
- Heat your oven to 350°F and line an 8 inch square pan with parchment paper, letting the paper hang over two sides for easy lifting later.
- Mix the dry base:
- Combine oats and salt in a large bowl, giving them a quick stir to distribute the salt evenly.
- Add the wet ingredients:
- Pour in mashed banana, water, sweetener, oil or nut butter, and vanilla. Stir until everything is evenly moistened and no dry oats remain visible.
- Fold in your extras:
- Gently incorporate chocolate chips, nuts, or dried fruit if using, being careful not to overmix.
- Spread and bake:
- Transfer batter to your prepared pan and smooth the top with a spatula. Bake for exactly 20 minutes.
- The crucial rest:
- Turn off the oven but leave the door closed. Let the bars sit inside for 5 more minutes to finish setting without drying out.
- Cool completely:
- Remove from oven and let cool completely before slicing into 6 to 9 bars. This patience pays off in cleaner cuts and better texture.
 Save
Save These have become my go to for Sunday meal prep. I wrap individual bars and freeze them, then grab one each morning during the week. My daughter now calls them her breakfast candy, which I consider a parenting win.
Storage and Freezing
Store leftover bars in an airtight container in the refrigerator for up to 4 days. For longer storage, wrap individually in plastic wrap and freeze for up to 3 months. Thaw overnight in the refrigerator or grab frozen and warm briefly in the microwave.
Flavor Variations
Swap the banana for unsweetened applesauce for a lighter, fruitier bar. Pumpkin puree works beautifully in fall and adds extra nutrients. Try adding cinnamon, nutmeg, or a pinch of cardamom for warm spice notes. For a chocolate version, add 2 tablespoons cocoa powder and increase sweetener slightly.
Serving Suggestions
These bars shine on their own but become extraordinary with simple toppings. Try them warm with a smear of almond butter or Greek yogurt. Crumble a bar over oatmeal or yogurt parfaits for added texture and sweetness. For dessert, serve with a drizzle of melted dark chocolate or a scoop of vanilla ice cream.
- Pair with morning coffee or tea for a satisfying breakfast
- Tuck into lunchboxes for a wholesome afternoon snack
- Pack for hiking or road trips as travel friendly fuel
 Save
Save Theres something deeply satisfying about turning those overlooked spotted bananas into something my family actually requests. These bars have transformed our morning chaos into something a little more peaceful and a lot more delicious.
Recipe FAQ
- → Can I make these oatmeal bars ahead of time?
Absolutely. These bars are perfect for meal prep. Store in an airtight container in the refrigerator for up to 4 days, or freeze individually wrapped bars for up to 3 months. Thaw overnight in the refrigerator or microwave for 20-30 seconds.
- → What can I use instead of banana?
Unsweetened applesauce or pumpkin purée work well as substitutes. Keep in mind the flavor and sweetness will vary slightly. You may need to adjust the sweetener depending on the fruit's natural sweetness.
- → How do I know when the bars are done baking?
The bars are ready when the edges are lightly golden and the center feels set but still slightly soft. They will continue cooking as they rest in the closed oven, which helps achieve the perfect chewy texture.
- → Can I add protein powder to these bars?
Yes. Add one scoop of your favorite protein powder and reduce the oats by about 2-3 tablespoons to maintain the right consistency. Vanilla or unflavored powder works best without overpowering the banana flavor.
- → Are these bars suitable for special diets?
These bars are naturally vegetarian and can be dairy-free, gluten-free, and vegan. Use certified gluten-free oats for GF needs. Choose maple syrup or agave instead of honey for vegan. Oil or extra water keeps them dairy-free.
- → Why let the bars cool in the oven?
Letting them rest in the closed oven allows the bars to set completely without over-baking. This gentle cooling time helps achieve the ideal texture—firm enough to hold their shape but still soft and chewy.