 Save
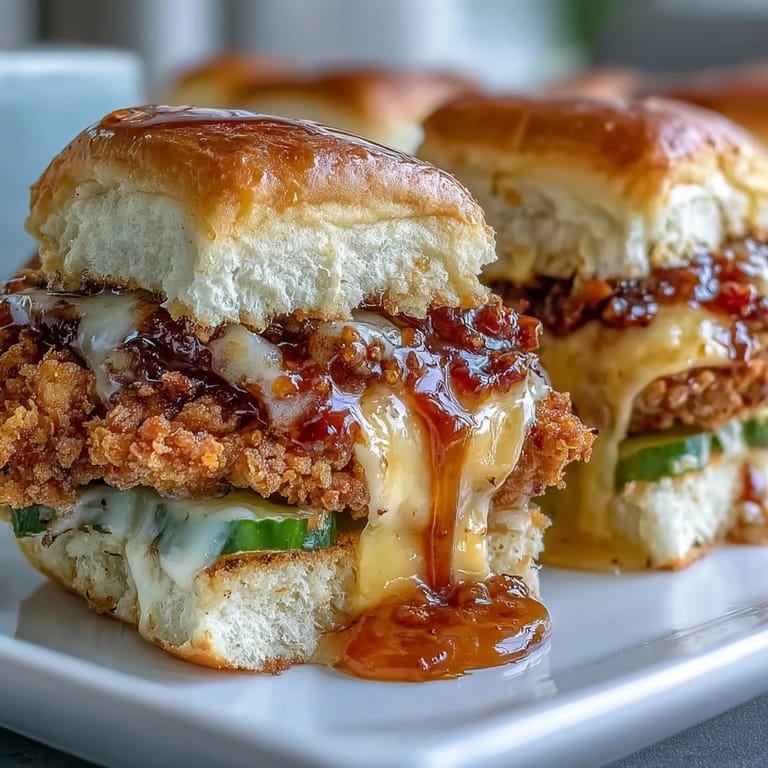
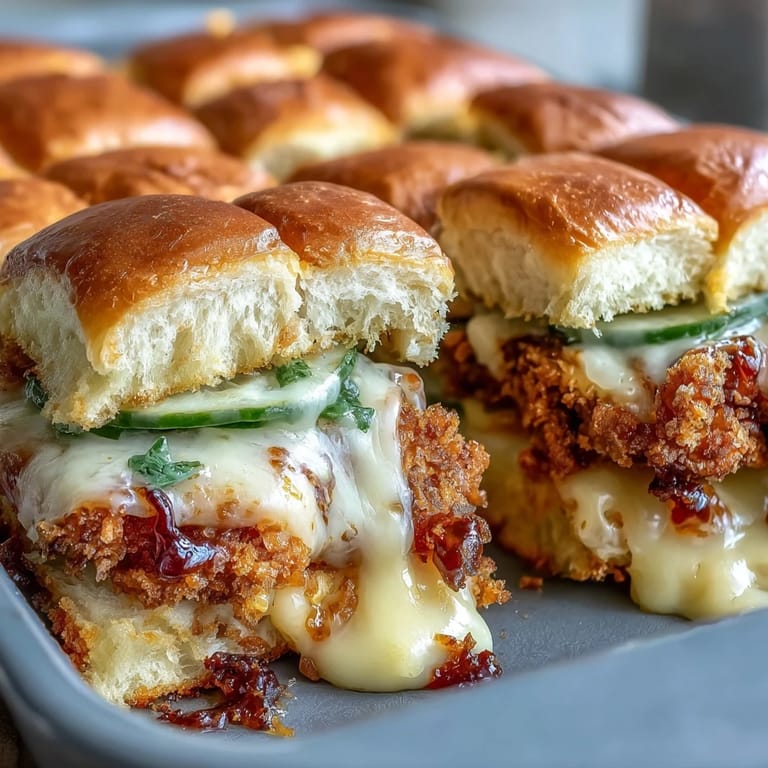
Save My friend texted me at 2 PM on a Sunday asking if I could bring something to their game day party, and I had exactly three hours to figure it out. I'd been craving those crispy, saucy chicken sandwiches from the food truck down the street, but wanted something that could feed a crowd without requiring me to stand over a stove all afternoon. That's when it hit me: what if I turned that whole experience into a bake that people could just pull apart and devour? The result was this spicy honey butter chicken sandwich situation, and honestly, it became the thing everyone asked me to make again.
Last month I made this for twelve people crammed into a living room, and within twenty minutes there were only crumbs left on the baking dish. My aunt, who's notoriously picky about texture, asked for the recipe before she even finished her second slider. That moment when someone's so caught up in eating that they forget to complain? That's when you know you've made something special.
Ingredients
- Chicken tenders: Fresh or frozen works, but thaw them first so they cook evenly and stay tender inside while crisping up outside.
- Buttermilk: This is your secret weapon for keeping the chicken moist; don't skip it or substitute regular milk because the acidity really matters here.
- Panko breadcrumbs: The larger flakes stay crunchier than regular breadcrumbs, and that texture is what makes this feel special instead of just breaded chicken.
- Smoked paprika, garlic powder, onion powder: These three create a savory base that plays perfectly with the sweet honey and heat from the hot sauce.
- Cayenne pepper: Start with a teaspoon and taste as you go; heat tolerance varies wildly, and you can always add more but you can't take it back.
- Hot sauce: Frank's RedHot is reliable and not too vinegary, but use whatever you keep in your fridge because your favorite will taste better anyway.
- Honey: It balances the spice and adds a subtle gloss that makes everything look intentional rather than accidental.
- Slider buns or Hawaiian rolls: Hawaiian rolls add a hint of sweetness that contrasts beautifully with the spicy chicken, and they're sturdy enough to hold up to the layers.
- Cheddar or pepper jack cheese: Pepper jack brings its own heat, so if you go that route, dial back the cayenne slightly to avoid overwhelming people.
- Dill pickles: The acidity cuts through the richness and keeps your palate from getting tired partway through.
Tired of Takeout? 🥡
Get 10 meals you can make faster than delivery arrives. Seriously.
One email. No spam. Unsubscribe anytime.
Instructions
- Set your stage:
- Preheat to 425°F and line a baking sheet with parchment paper, then give it a light coating of spray or oil so nothing sticks and you're not wrestling with your chicken later.
- Marinate the chicken:
- Whisk buttermilk and egg together, add your chicken tenders, and let them sit for ten minutes while you prep everything else. This isn't just time-saving; it's actually transforming the chicken into something more tender.
- Coat and arrange:
- Mix your panko, flour, and all those spices in a shallow dish, then dredge each tender, shaking off excess marinade first. Arrange them on the sheet in a single layer so they have room to crisp up.
- Get them golden:
- Spray or drizzle with oil, then bake for 20 to 22 minutes, flipping halfway through so both sides turn crispy and golden. You're looking for an internal temperature of 165°F, but honestly, they'll look done before they are.
- Make the magic sauce:
- While the chicken's baking, whisk melted butter, honey, hot sauce, chili flakes if you're feeling brave, and salt together. Taste it first; this is your moment to adjust the heat or sweetness to match your crowd.
- Coat your chicken:
- The second the chicken comes out of the oven, toss it in that hot honey butter while everything's still warm and the coating is receptive. Every piece should be glossy and completely coated.
- Assemble the layers:
- Drop your oven to 350°F, slice those buns horizontally (but keep the bottoms connected), and layer them in a 9x13 baking dish. Bottom buns first, then cheese, then your honey butter chicken, then pickles, then tops.
- Final bake:
- Brush the tops with melted butter, sprinkle with sesame seeds if you want a little textural moment, and bake uncovered for 7 to 10 minutes until the cheese melts and the tops just barely toast. You're not trying to char anything; you just want the cheese to soften and everything to meld together.
 Save
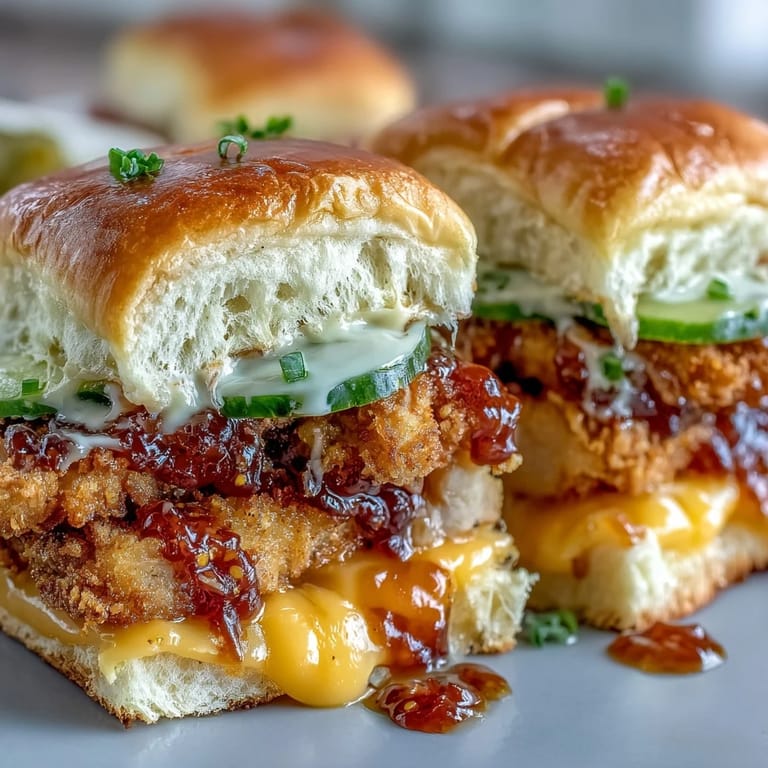
Save There's something unexpectedly satisfying about watching people pull these apart at the table instead of plating them individually. It feels less formal and more communal, and somehow that makes the whole meal feel less like dinner and more like an event.
The Spice-to-Sweetness Balance
This dish walks a careful line between hot and sweet, and that's actually what makes it so craveable. The honey mellows the cayenne and hot sauce, but the spices still build on the back of your palate, so you get this lingering warmth that keeps pulling you back for another bite. I learned the hard way that if you skip the honey or reduce it, the whole thing becomes one-note spicy and loses its depth. The sweetness isn't about toning down heat for picky eaters; it's about creating complexity so even people who don't usually like spicy food find themselves reaching for another slider.
Making It Your Own
The beauty of this recipe is that it's a blueprint, not a mandate. I've made it with sriracha instead of Frank's, and it shifted the whole flavor profile in a subtle way that still worked. My neighbor once brought garlic aioli to spread on the inside of the buns before assembly, and it was honestly the best adjustment I didn't know I needed. The chicken, honey butter, and pickles are the non-negotiables, but everything else is flexible depending on what you have and what you love.
Storage and Timing Tips
You can bread the chicken tenders the night before and keep them covered in the fridge, which means your morning is just baking and assembling. The hot honey butter can be made ahead too, though I warm it gently before tossing the chicken so it coats evenly. If you're making this for a crowd, you can have everything layered and ready to bake two hours early; just cover it loosely and add an extra minute or two to the final bake time since it'll start cold.
- The chicken tenders stay crispest if you eat them within an hour of the final bake, but honestly, cold leftovers are kind of amazing the next day.
- If you're freezing these, do it before the final bake, and add about five extra minutes when cooking from frozen.
- Leftover honey butter keeps for a week in the fridge and is incredible on everything from roasted vegetables to popcorn to literally any chicken you make.
 Save
Save This recipe has become my answer to almost every casual gathering because it delivers the experience of something fancy without requiring any real finesse. It's the kind of dish that makes people happy, which is really the whole point.
Recipe FAQ
- → Can I make these sliders ahead of time?
Yes, you can bread and bake the chicken tenders up to a day in advance. Store them in the refrigerator, then reheat and toss in the honey butter sauce before assembling and baking the sliders for the final 7-10 minutes.
- → What type of cheese works best?
Cheddar and pepper jack both melt beautifully and add great flavor. Pepper jack brings extra heat that complements the spicy honey butter sauce, while sharp cheddar provides a nice tangy contrast.
- → How can I make these less spicy?
Reduce the cayenne pepper in the breading to ½ teaspoon, use a milder hot sauce, or omit the chili flakes from the honey butter sauce. The sweetness of the honey helps balance the heat naturally.
- → Can I use regular chicken breasts instead of tenders?
Absolutely. Slice chicken breasts into strips about the same size as tenders. Pound them slightly to even thickness so they cook evenly alongside the natural tenders.
- → What's the best way to reheat leftover sliders?
Wrap individual sliders in foil and reheat in a 350°F oven for 10-12 minutes. This keeps the buns soft while warming the filling through. Avoid microwaving, which makes the buns soggy.
- → Can I freeze the assembled sliders before baking?
Yes, assemble the sliders completely through step 10, then wrap tightly and freeze for up to 2 months. Bake from frozen at 350°F for 20-25 minutes until heated through and cheese melts.