 Save
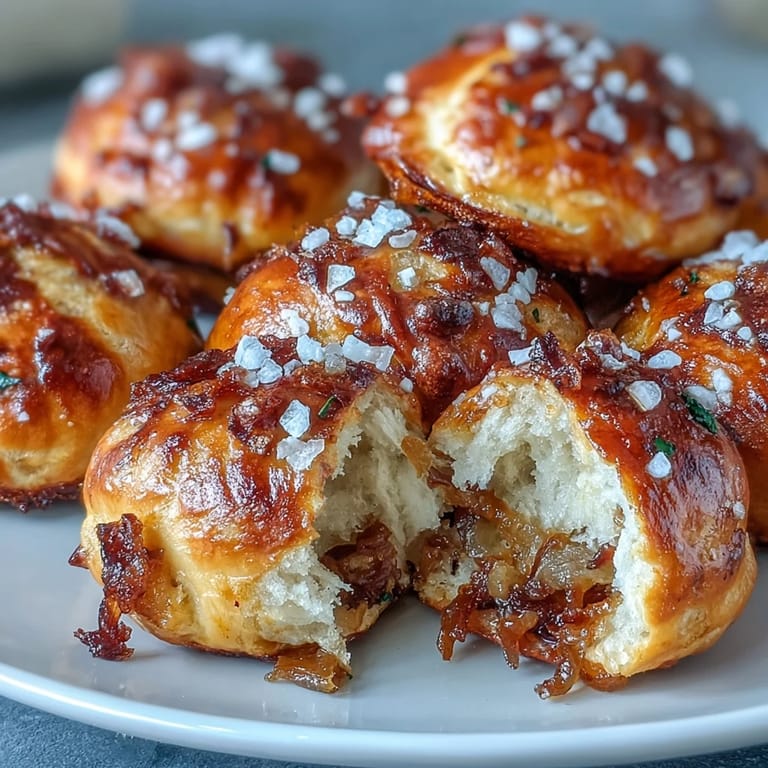
Save There's something about the smell of caramelizing onions that stops me mid-afternoon, every time. Years ago, I was experimenting with sourdough scraps and a pan of golden onions, wondering if I could turn them into something worth sharing. These pretzel bites emerged from that restless kitchen moment, and they've somehow become the thing people ask me to bring to gatherings. Soft, salty, with that deep umami from onions that make you reach for another handful before you realize it.
I made these for the first time at a friend's dinner party, nervous about the baking soda bath step because I'd never done it before. The kitchen filled with this surprising, sharp smell when the baking soda hit the water, but watching those little dough pieces puff up and turn mahogany in the oven felt like I'd unlocked something. My friend kept eating them straight off the cooling rack, and I realized I'd stumbled onto something that actually works.
Ingredients
- Active sourdough starter (1 cup): Make sure yours is bubbly and lively; it's the backbone of the flavor here, so don't use a sluggish starter.
- Bread flour (2 ½ cups): This gives you structure and chew; all-purpose will work but the texture won't be quite as tender.
- Warm water (⅔ cup): The temperature matters more than you'd think—too hot kills the starter, too cold and your dough won't rise properly.
- Unsalted butter (2 tbsp melted): This adds richness and helps the crust brown gorgeously in the oven.
- Granulated sugar (1 tbsp): Just a touch to help the yeast along and balance the savory onions.
- Fine sea salt (1 tsp for dough, ½ tsp for onions): Don't skip seasoning the onions as they cook; it draws out their natural sweetness.
- Yellow onion (1 medium, finely diced): Medium onions are perfect because they caramelize evenly without taking forever.
- Olive oil (1 tbsp): Use something you'd actually taste; cheap oil makes a difference in the final flavor.
- Baking soda (¼ cup): This alkaline bath gives pretzels their signature chew and deep brown color, so don't skip it or substitute.
- Egg (1, beaten): Your egg wash—it seals the surface and gives that shiny, professional-looking finish.
- Flaky sea salt for topping: Maldon or similar; it adds a textural pop that table salt can't match.
- Optional chives or dried onion flakes: These are a sneaky way to double down on the onion flavor if you're feeling ambitious.
Tired of Takeout? 🥡
Get 10 meals you can make faster than delivery arrives. Seriously.
One email. No spam. Unsubscribe anytime.
Instructions
- Caramelize the onions first:
- Heat olive oil in a skillet over medium heat, add your diced onion with a pinch of salt, and let it cook low and slow for 12 to 15 minutes, stirring occasionally so it colors evenly without burning. You'll know they're ready when they've turned a deep golden-brown and smell almost sweet; this is where the magic happens flavor-wise.
- Mix your dough base:
- Combine your active starter, bread flour, warm water, melted butter, sugar, and salt in a large bowl, mixing until everything comes together into a shaggy mass. Don't worry if it looks rough—that's exactly what you want at this stage.
- Knead in the caramelized onions:
- Once your onions have cooled slightly, add them to the dough and knead by hand or with a dough hook for 7 to 10 minutes until the dough becomes smooth and elastic. The onions will be distributed throughout, and your dough should feel silky and spring back when you poke it.
- Let it rise and double:
- Place your dough in a lightly greased bowl, cover it, and find a warm spot in your kitchen to let it sit for about 2 hours or until it's roughly doubled in size. A warm kitchen window works, or if you're impatient like me, the top of your turned-off oven.
- Shape and cut your bites:
- Preheat your oven to 425°F and line two baking sheets with parchment paper, then turn your risen dough onto a floured surface. Divide it into 4 pieces, roll each into a 12-inch rope, and cut crosswise into 1-inch segments—you'll end up with about 40 little bites.
- Prepare the baking soda bath:
- Bring 6 cups of water to a rolling boil in a large pot, then carefully add the baking soda (it will fizz up dramatically, so pour slowly). Working in small batches to avoid crowding, drop your pretzel bites into the boiling water for exactly 30 seconds, then fish them out with a slotted spoon and arrange them on your prepared baking sheets.
- Finish and bake:
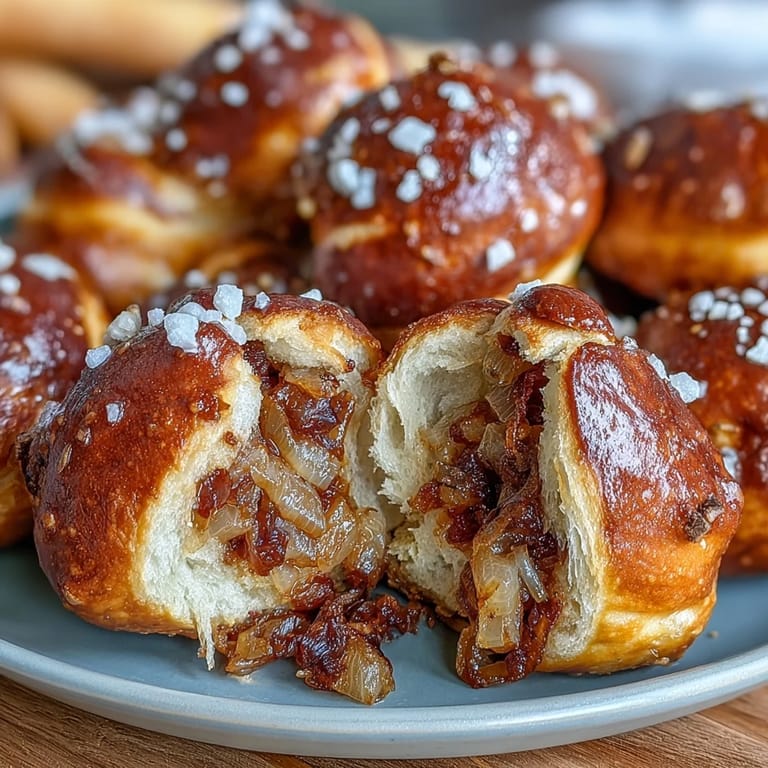
- Brush each bite with beaten egg wash and sprinkle generously with flaky sea salt—and chives if you're using them. Bake for 12 to 15 minutes until they're a deep, rich golden-brown, then let them cool just long enough that you won't burn your mouth.
 Save
Save Last month, my partner came home to find pretzel bites cooling on every available surface, and without asking, started eating them standing at the counter like they were going out of style. That moment—when food stops being about technique and becomes just about the simple pleasure of something warm and good—that's when I knew I'd made something worth repeating.
The Sourdough Advantage
Using sourdough starter instead of commercial yeast changes everything about these bites. The fermentation creates layers of flavor you can't get from a packet of instant yeast, and there's something satisfying about using the part of your starter you'd normally discard. Your pretzel bites will have a subtle tang that makes people pause and ask what you did differently, and you can just smile mysteriously.
Caramelizing Onions: The Patience Lesson
I used to rush this step, turning up the heat and hoping for the best, which just gave me burnt onions and regret. Learning to cook them low and slow, stirring maybe every minute or two, revealed that caramelization isn't about speed—it's about letting the natural sugars in the onion develop over time. The first time you actually taste properly caramelized onions, it's a revelation. They're sweet, deep, almost nutty, and completely different from raw or quickly cooked onions.
Make-Ahead and Storage Wisdom
These pretzel bites are phenomenal because they hold up beautifully to real life. Bake them, let them cool completely, and freeze them in an airtight container for up to three weeks.
- Reheat frozen bites in a 350°F oven for 5 to 7 minutes and they taste nearly as good as the day you made them.
- You can also keep them at room temperature in an airtight container for a couple of days, and they're honest to eat slightly stale—just not quite as magic.
- If you're bringing them to a party or potluck, pack them in a container with a tea towel instead of plastic wrap so they don't steam and get soggy.
 Save
Save Every time I make these, I'm reminded that the best recipes are the ones that invite you back to the kitchen again and again. These sourdough onion pretzel bites have that quality—they're not complicated, but they feel special, and they taste like you've put in far more effort than you actually have.
Recipe FAQ
- → What makes the pretzel bites soft?
The use of active sourdough starter and a slow rise in the dough contributes to a soft, tender interior.
- → How do caramelized onions affect the flavor?
Caramelized onions add a sweet, rich depth that balances the tang of the sourdough, enhancing overall taste.
- → Why is a baking soda bath necessary?
Briefly boiling the dough in a baking soda solution creates a chewy crust with classic pretzel texture and deep color.
- → Can these be frozen for later use?
Yes, once baked and cooled, the bites can be frozen and reheated in the oven for a fresh texture.
- → What are good accompaniments for serving?
These bites pair well with mustard, cheese dips, or a creamy onion spread for added flavor.