 Save
Save I still remember the afternoon I was frantically planning my niece's graduation party, scrolling through decoration ideas when it hit me—why not make the food match the celebration itself? That's when I invented these little graduation cap snacks. They were meant to be a silly garnish, but watching her face light up when she realized what they were made me realize that the best recipes are the ones that make people smile before they even take a bite. Now, whenever there's a celebration in our family, someone always asks, "Are you making the graduation caps?"
I made a batch of these for my coworker's surprise promotion party, and I watched someone's grandmother ask for the recipe—not because she needed instructions, but because she wanted to make them for her own grandchild's graduation. That moment taught me that food isn't just about taste; it's about creating little memories people want to recreate in their own families.
Ingredients
- Square crackers (Wheat Thins, water crackers, or similar): These form your cap's foundation and need to be sturdy enough to hold the cheese and tassel without bending. I learned the hard way that thin, delicate crackers will wilt under the weight, so choose ones with a satisfying snap when you break them.
- Square cheese slices (cheddar, Swiss, or American): The cheese is your cap's body, and keeping it in perfect squares is what makes these instantly recognizable. Room temperature cheese is easier to work with than cold, straight-from-the-fridge slices.
- Licorice strings or dried fruit strips: Your tassel is what makes this snack instantly graduation-themed. Black licorice is traditional and dramatic, but mango or apricot strips add color and a subtle sweetness that some guests prefer, especially kids who find licorice too intense.
- Cream cheese or hummus (for adhesive): This edible glue is key to keeping everything in place. A small dab is all you need—too much and it oozes out the sides, too little and your tassel will slip.
- Candy pearls or raisins (optional, for the button): These tiny toppers represent the button on a real graduation cap. I skip them sometimes for a cleaner look, but they add that authentic detail that makes guests do a double-take.
Tired of Takeout? 🥡
Get 10 meals you can make faster than delivery arrives. Seriously.
One email. No spam. Unsubscribe anytime.
Instructions
- Gather your workspace:
- Lay out a clean cutting board and arrange all your ingredients within arm's reach. Having everything visible helps the assembly flow smoothly, and honestly, it makes the process feel more like a fun craft project than a chore.
- Build your base:
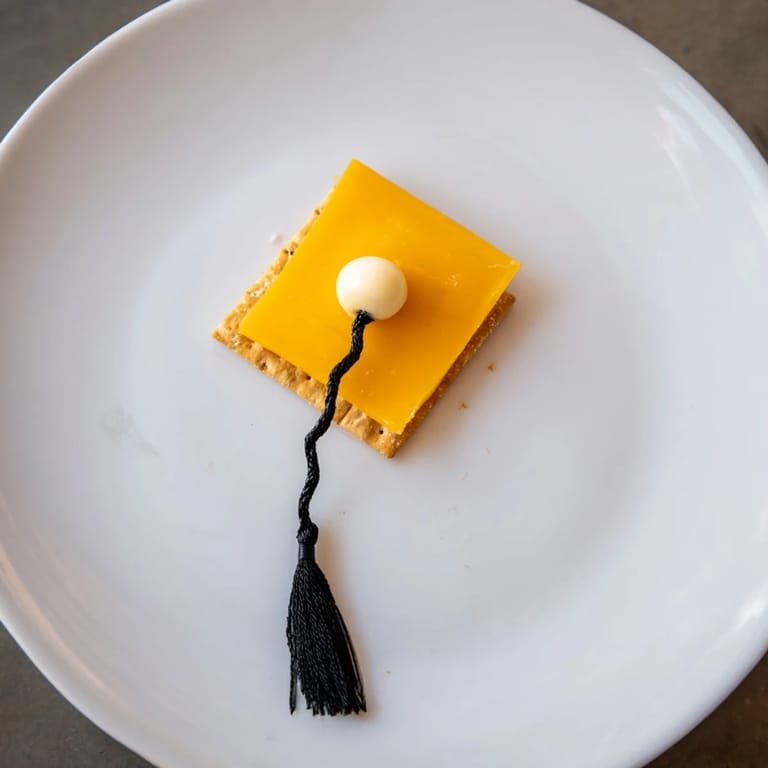
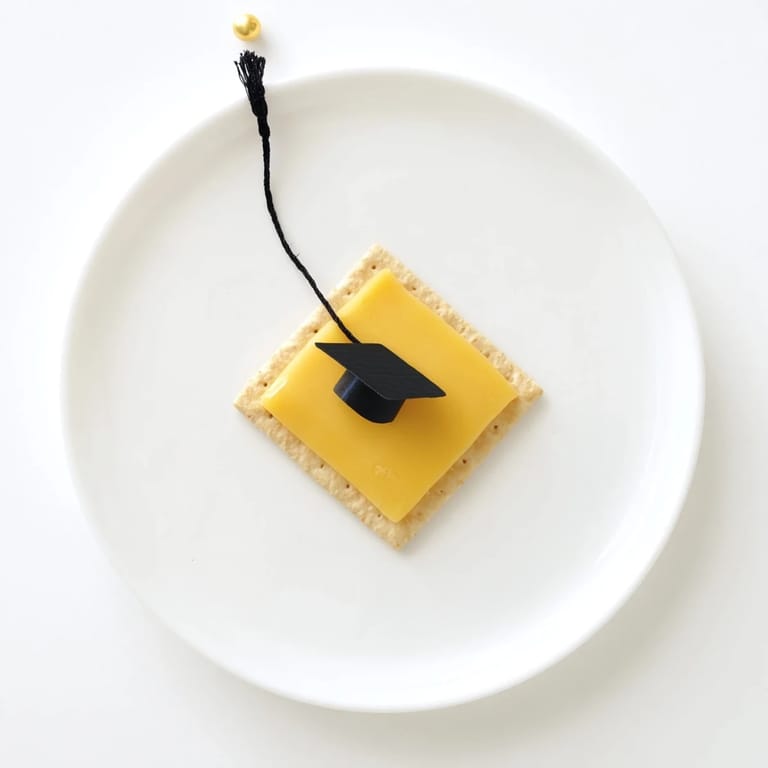
- Place a cracker on your serving platter and top it with a cheese square, making sure the edges align as perfectly as you can. This is what makes it look like an actual graduation cap—the geometric precision is part of the charm.
- Attach the tassel:
- Take a licorice string or fruit strip and use a tiny dab of cream cheese or hummus on one corner of the cheese to secure it. Press firmly for just a second, then let it drape down naturally over the edge. This is the moment the snack transforms into something recognizable, and it never gets old.
- Add the finishing touch:
- If you're using them, place a candy pearl or raisin at the end of your tassel where it would button on a real cap, securing it with another dab of cream cheese. This step is optional but absolutely worth it for the extra authenticity.
- Complete the batch and serve:
- Repeat with all your remaining ingredients, arranging them on a platter as you go. Serve immediately while the textures are at their best—crispy crackers, creamy cheese, and tassel that still has a little bounce to it.
 Save
Save At my niece's graduation party, I watched three different families write down the recipe, and one mom pulled me aside to say she was already planning to make them for her daughter's promotion at work next month. That's when I knew these weren't just cute snacks—they were little edible keepsakes that people wanted to share with the people they loved.
Making Them Your Own
The magic of these snacks is how easily they adapt to whatever you're celebrating. Swap the cheese for different varieties—creamy brie rounds feel fancier, while pepper jack adds a little heat. Change the tassel colors to match your event's theme: silver licorice for a winter party, colorful fruit leather for a rainbow celebration. One friend of mine makes them with everything bagels instead of crackers for a New York twist. There's no wrong way to play with this concept, and that flexibility is exactly why these have become my go-to celebration snack.
Storing and Timing
These are absolutely best served fresh, ideally within an hour of assembly when the crackers are still crispy and everything holds together beautifully. If you're making them ahead, assemble the crackers and cheese in advance, but hold off on attaching the tassel and button until just before serving—they'll stay looking pristine, and you'll avoid any sogginess from the adhesive sitting too long. I've learned that a little last-minute assembly at a party actually becomes part of the fun, especially if you set up a small snack station where guests can watch you finish the final touches.
Celebrating Together
These little snacks remind me why I love cooking for celebrations—it's not about impressing anyone with complicated techniques or fancy ingredients. It's about creating something that makes people smile, something they remember, something they want to recreate themselves. The graduations and promotions these caps have decorated feel less like milestones and more like moments we're all in together, marking life's transitions with food that tastes as good as it looks.
- Make them on the day of your event for the crispiest, freshest results
- If someone wants to eat one before the party officially starts, let them—these are meant to be enjoyed, not just admired
- Always have a few extra crackers and cheese on hand in case you want to make a few bonus caps while you're already in assembly mode
 Save
Save These graduation cap snacks have taught me that sometimes the best recipes are the ones that celebrate life's moments and bring people together through a shared smile. Make them for your next celebration, and watch how something so simple becomes something so memorable.
Recipe FAQ
- → What cheeses work best for the cap?
Firm and mild cheeses like cheddar, Swiss, or American slices hold shape well and complement the crackers.
- → Can I substitute licorice for the tassel?
Yes, dried fruit strips like mango or apricot make excellent colorful, natural alternatives to licorice.
- → How do I attach the tassel securely?
Use a small amount of cream cheese or hummus as adhesive to stick one end of the tassel to the cheese corner.
- → Are there gluten-free base options?
Gluten-free crackers work well as a substitute to accommodate dietary needs without compromising texture.
- → What optional garnish can enhance the snack?
Small candy pearls or raisins placed on the tassel’s end add a decorative, festive button effect.