 Save
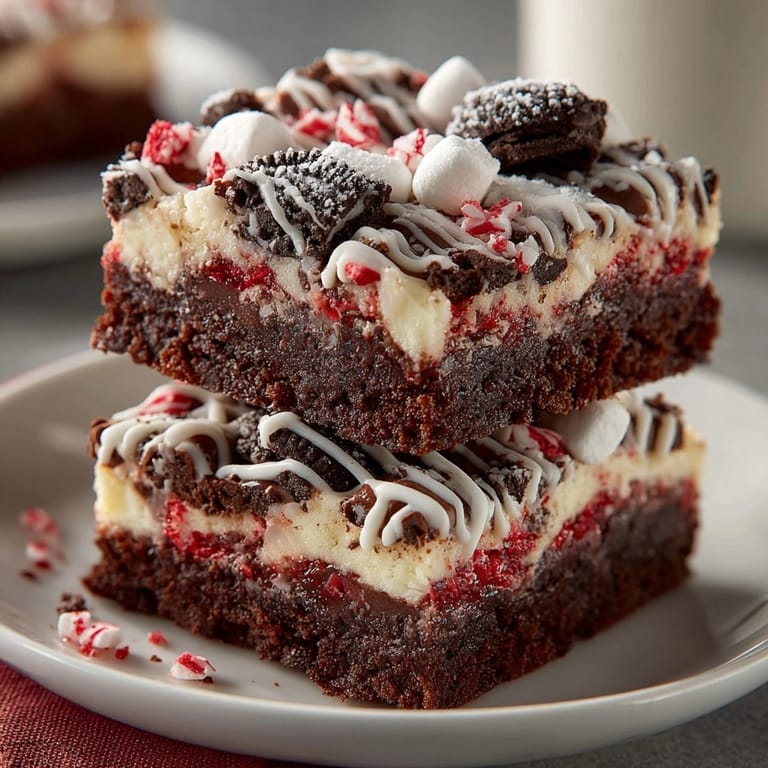
Save This decadent no-bake Chaos Peppermint Chocolate Cookie Rubble Bars recipe has been my holiday secret weapon for years. The combination of crushed chocolate cookies, creamy peppermint-infused chocolate, and playful marshmallow swirls creates a dessert that looks impressively chaotic yet tastes perfectly balanced. I love how these bars bring together nostalgic holiday flavors in a modern, crowd-pleasing treat.
I first created these bars when my oven broke two days before a holiday party. What started as a desperate solution has become our most requested December treat, with friends now expecting their annual batch of "chaos bars" as we affectionately call them.
Ingredients
- Chocolate sandwich cookies: the foundation of our bars providing that perfect cookie crunch and deep chocolate flavor. Look for cookies with a good filling to cookie ratio for best texture.
- Unsalted butter: binds our cookie base together. Use high quality butter for best flavor as it makes a noticeable difference.
- Dark chocolate: forms the main flavor base. Choose a chocolate with 60 70 percent cocoa for balanced sweetness and rich flavor.
- Milk chocolate: adds creaminess to balance the dark chocolate. Select a smooth variety for best melting properties.
- Peppermint extract: provides the signature holiday flavor. Pure extract rather than artificial flavoring gives a cleaner taste.
- Mini marshmallows: create pockets of softness throughout the bars. Fresh marshmallows work best for ideal texture.
- Peppermint candies: add festive color and intense mint bursts. Crush them just before using to maintain their vibrant appearance.
- White chocolate: creates beautiful contrast and adds another layer of sweetness. Real white chocolate with cocoa butter melts more smoothly than candy coating.
Tired of Takeout? 🥡
Get 10 meals you can make faster than delivery arrives. Seriously.
One email. No spam. Unsubscribe anytime.
Instructions
- Prepare the Pan:
- Line your 9x9 baking pan with parchment paper ensuring you have overhang on all sides. This step is crucial for easy removal later so be generous with the paper. Smooth it into corners for clean edges on your finished bars.
- Create the Cookie Base:
- Thoroughly crush your chocolate sandwich cookies until they resemble coarse sand with some small chunks remaining for texture. Mix with melted butter until every crumb is moistened. Press this mixture firmly into your prepared pan using the bottom of a measuring cup to create a compact even layer. The more firmly packed your base the less likely it will crumble when cutting.
- Chill the Base:
- Place your pan in the refrigerator for at least 15 minutes. This critical step ensures your base is firm enough to support the chocolate layer without the layers mixing together. A properly chilled base creates distinct beautiful layers in the final bars.
- Prepare the Chocolate Layer:
- Melt your dark and milk chocolates together using either the double boiler method or microwave in 30 second intervals stirring between each. Stop heating when the chocolate is about 80 percent melted and continue stirring to prevent overheating. Once completely smooth incorporate the peppermint extract stirring thoroughly to distribute the flavor evenly.
- Assemble the Layers:
- Pour your melted chocolate mixture over the chilled cookie base using an offset spatula to spread it into an even layer reaching all corners. Work quickly before the chocolate begins to set. The chocolate layer should be thick enough to hold your toppings but not so thick that it overwhelms the cookie base.
- Add the Rubble Toppings:
- While the chocolate is still warm sprinkle your marshmallows crushed peppermint candies and cookie pieces across the surface. Press them gently into the chocolate just enough to adhere but not so much that they sink completely. Arrange for visual appeal with an even distribution of colors and textures.
- Finish with Drizzle:
- Melt your white chocolate until completely smooth then transfer to a small plastic bag with a tiny corner snipped off. Drizzle in a zigzag pattern across the entire surface creating a decorative finish that helps bind the toppings together.
- Chill and Set:
- Refrigerate your bars for a full 2 hours or until completely firm. Patience is key here as cutting too soon will result in messy edges and uneven pieces. The bars should feel solid to the touch before removing from the refrigerator.
 Save
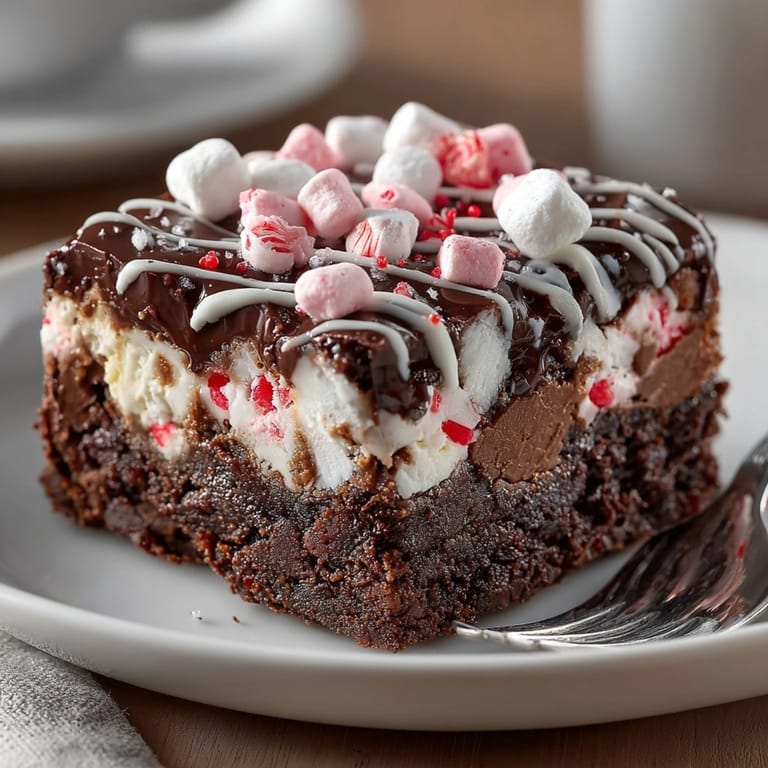
Save My absolute favorite part of this recipe is the textural contrast between the crunchy cookie base, smooth chocolate middle, and varied toppings. I remember the first time my niece helped make these she called them "snowstorm cookies" because the white chocolate drizzle reminded her of snow falling over a chocolate landscape.
Storage Tips
These bars will keep beautifully for up to a week when stored properly in an airtight container in the refrigerator. Place parchment paper between layers if stacking to prevent them from sticking together. For best flavor allow them to sit at room temperature for about 10 minutes before serving to soften slightly and enhance the flavor notes.
For longer storage these bars freeze exceptionally well. Wrap individual portions in parchment paper then place in a freezer safe container. They will maintain quality for up to 3 months. Thaw overnight in the refrigerator or for about 30 minutes at room temperature before enjoying.
Ingredient Substitutions
This recipe welcomes creative adaptations based on your preferences or what you have available. For a different flavor profile substitute the peppermint extract with orange or almond extract and adjust toppings accordingly. If you prefer a less sweet version use bittersweet chocolate instead of the dark and milk combination.
For a dairy free version use coconut oil instead of butter and dairy free chocolate. Those avoiding gluten can select gluten free chocolate sandwich cookies. The marshmallows can be replaced with dried fruit pieces or additional crushed cookies if preferred.
Serving Suggestions
These indulgent bars shine when served alongside complementary beverages. Try pairing with hot chocolate topped with whipped cream for a double chocolate experience or with peppermint tea for an enhanced minty flavor. For adult gatherings a glass of port wine or coffee liqueur makes an excellent accompaniment.
For a dessert table presentation cut these into smaller bite sized pieces and arrange on a tiered platter interspersed with fresh mint leaves. During summer months serve with a scoop of vanilla ice cream for a delightful contrast of temperatures and textures.
Seasonal Adaptations
Winter Holiday Version: Use red and green sprinkles along with the peppermint for a festive Christmas look. Add a touch of cinnamon to the chocolate layer for warmth. Package in holiday tins for beautiful homemade gifts.
Summer Adaptation: Replace peppermint with orange extract and add dried cranberries. Use colorful sprinkles instead of candy pieces for a birthday party feel. Serve slightly frozen as a refreshing warm weather treat.
 Save
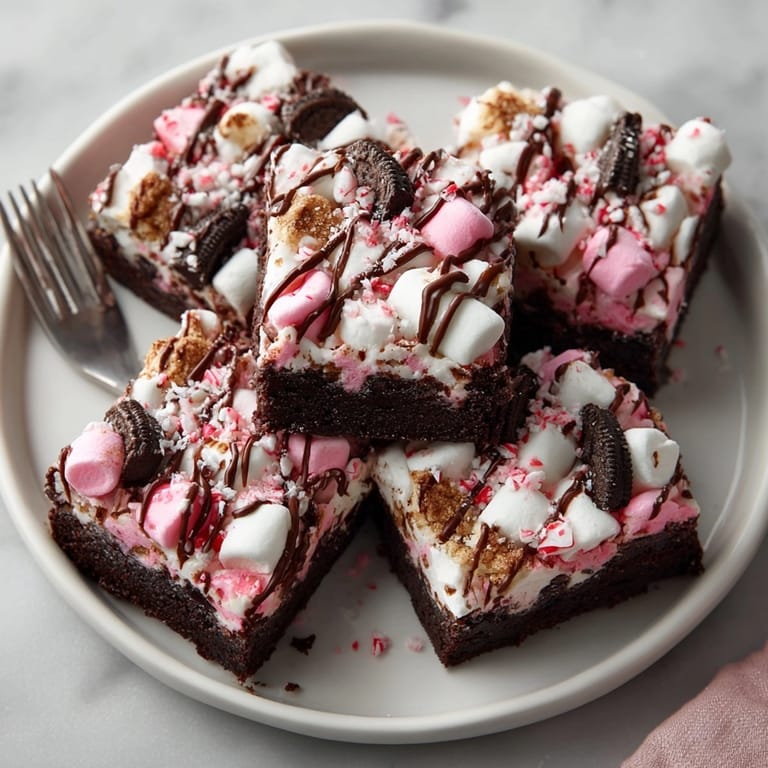
Save These bars offer a delightful combination of textures and flavors, making them a perfect treat for any occasion. Enjoy the satisfying crunch, smooth chocolate, and bursts of mint.
Recipe FAQ
- → Can I use different chocolate cookies?
Yes, any chocolate sandwich cookie works well. Classic Oreos or similar brands both provide great flavor and texture.
- → Is there a gluten-free option?
Absolutely! Substitute regular chocolate sandwich cookies with your favorite gluten-free version for a gluten-free result.
- → How do I cut clean bars?
Use a sharp knife dipped in hot water, wiping between cuts. This helps achieve neat slices without cracking the chocolate.
- → Can I make these ahead?
Yes, the bars keep well chilled for up to 5 days in an airtight container. They're great for preparing in advance.
- → Are nuts necessary in the topping?
No, nuts are optional. You can add toasted chopped nuts for crunch, or omit them for a nut-free treat.
- → What alternatives for peppermint candies?
Try toffee bits, colorful sprinkles, or omit entirely for a simple chocolate-marshmallow topping.