Save
Save My daughter discovered Cookie Run Kingdom on a rainy Tuesday, and suddenly every conversation started with pastels and whimsy. When her birthday rolled around, she didn't want a store-bought cake—she wanted cookies that looked like they belonged in that colorful game world. I found myself standing in the kitchen with gel food coloring and rope-like dough, twisting colors together like I was creating edible art. What started as a birthday request became something I'd make again and again, each time feeling a little more confident with the swirls.
I'll never forget watching my son bite into one of these cookies at his friend's house, then immediately FaceTiming me to show off how the swirls looked inside. The other kids crowded around asking for the recipe like it was some secret treasure. That's when I realized these weren't just cookies—they were conversation starters, little edible gifts that made people smile before they even tasted them.
Ingredients
- All-purpose flour (2 1/2 cups): The foundation that keeps these cookies tender without being cake-like, so don't skimp on quality or skip the baking powder that gives them a delicate crumb.
- Unsalted butter (1 cup): Room temperature is non-negotiable here—cold butter won't cream properly, and you'll lose that light, fluffy base that makes them melt in your mouth.
- Granulated sugar (1 cup): This sweetness balances the butter and creates structure, so measuring by weight really does make a difference if you have a scale.
- Egg (1 large): The binder that holds everything together without making the dough dry or tough.
- Vanilla and almond extracts: Vanilla is the backbone of flavor, while almond extract adds a subtle sophistication that guests will taste but not quite name.
- Gel food coloring: Always gel, never liquid—liquid dyes thin out the dough and muddy your beautiful pastels into murky browns.
- Pastel sprinkles: The final flourish that makes these unmistakably festive and fun.
Tired of Takeout? 🥡
Get 10 meals you can make faster than delivery arrives. Seriously.
One email. No spam. Unsubscribe anytime.
Instructions
- Mix your dry ingredients first:
- Whisk together flour, baking powder, and salt in a medium bowl, then set it aside—this keeps everything from clumping and ensures even distribution of leavening.
- Cream butter and sugar until fluffy:
- Take about 2 to 3 minutes with an electric mixer, watching as the mixture transforms from pale and dense to light and airy, almost like mousse. This step is where the magic of tender cookies begins.
- Bring the wet ingredients together:
- Add your egg, vanilla, and almond extract to the creamed mixture, beating until fully combined and smooth. Don't rush—let the mixer do the work here.
- Fold in the dry ingredients gently:
- Add the flour mixture slowly, mixing on low speed just until the streaks of flour disappear. Overmixing develops gluten, turning your cookies tough and chewy in all the wrong ways.
- Divide and color your dough:
- Split the dough into 3 or 4 portions depending on how many colors you're using, then add a tiny drop of gel food coloring to each section. Knead by hand until the color spreads evenly and no streaks remain—this is weirdly meditative and satisfying.
- Roll colored doughs into ropes:
- Shape each portion into a long, even rope about 12 inches long, using your palms and a light touch so the ropes stay flexible. If your dough gets sticky, pop it back in the fridge for 10 minutes.
- Twist and combine:
- Gently twist your colored ropes together like you're making an edible braid, then roll the whole thing into a log. The twist doesn't have to be perfect—a loose spiral actually looks more charming.
- Chill until firm:
- Wrap your log in plastic wrap and refrigerate for at least 2 hours, or overnight if you're doing this ahead. Cold dough slices cleanly without smudging the colors.
- Preheat and prepare:
- Get your oven to 350°F and line your baking sheets with parchment paper—this prevents sticking and makes cleanup effortless.
- Slice with intention:
- Cut your chilled dough into 1/4-inch thick rounds using a sharp knife, wiping the blade clean between slices so the colors stay crisp. Arrange them 2 inches apart on your prepared sheets.
- Add sprinkles for sparkle:
- Top each cookie with a few pastel sprinkles if you're going for extra festive appeal—they'll soften slightly during baking and create little pops of color.
- Bake with attention:
- Slide everything into the oven for 10 to 12 minutes, watching carefully as the edges just begin to turn golden. Pulling them out a minute early is better than one minute too late.
- Cool with patience:
- Leave the cookies on the baking sheet for 5 minutes to set up, then transfer to a wire rack where they'll finish cooling and harden into the perfect texture.
 Save
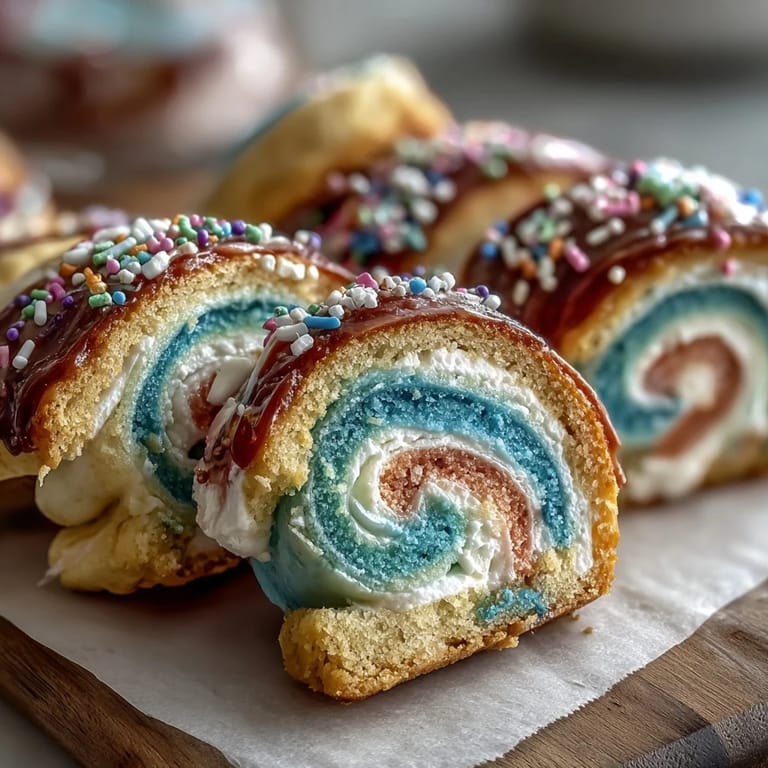
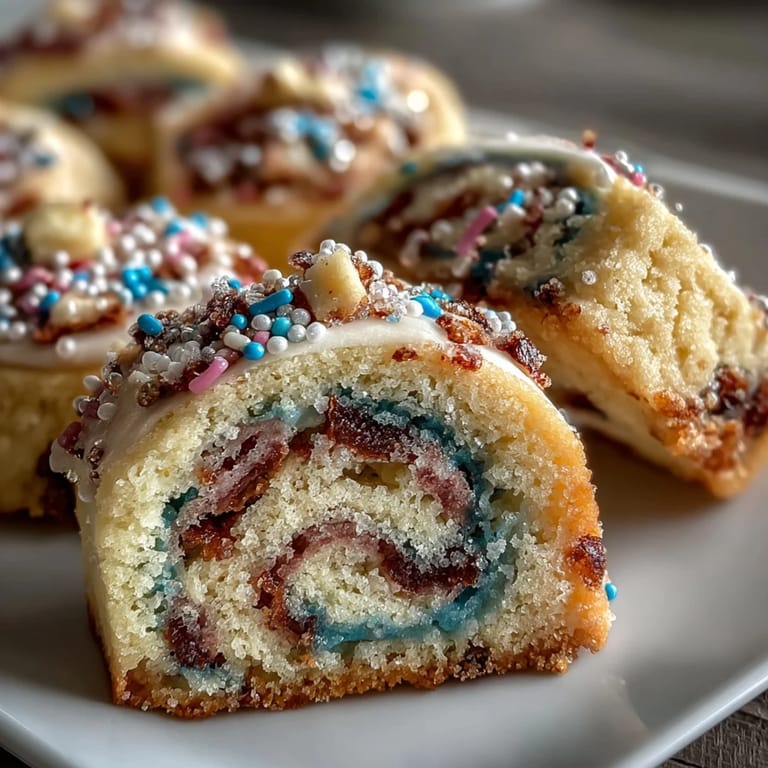
Save There's something deeply satisfying about slicing into that chilled log and seeing the swirled colors emerge, each cookie a tiny edible surprise. My kitchen always smells like butter and vanilla on cookie days, but with these, it's the anticipation that really fills the air—knowing something special is about to come out of the oven.
Storage and Longevity
These cookies keep beautifully in an airtight container at room temperature for up to 5 days, staying soft in the middle and just slightly crisp at the edges the way they should. If you've made extras or want to prep ahead, they freeze wonderfully for up to 2 months—just thaw at room temperature before serving, and they taste like they came straight from the oven.
Flavor Variations to Explore
The base recipe is versatile enough to play with, and I've experimented with adding zest from a lemon or orange to brighten the whole batch with citrus undertones. A tiny pinch of cardamom or a few drops of peppermint extract can completely transform the flavor profile without changing the beautiful appearance.
Making It Your Own
The joy of this recipe is that it invites customization—you could add sprinkles mid-bake, use different pastel combinations, or even try a two-color twist instead of four. Every kitchen, every baker, every celebration is different, so give yourself permission to make it uniquely yours.
- Don't stress about the swirls being picture-perfect because slight variations make each cookie feel individual and handmade.
- Keep gel food coloring on hand year-round so you're never caught without when inspiration strikes.
- Use these cookies for any celebration that needs a little whimsy and color in the world.
 Save
Save These pastel swirl cookies have become my go-to gift for friends with new babies, celebrations, or just because someone needed a reason to smile. There's real magic in watching someone's face light up when they realize the colors go all the way through.
Recipe FAQ
- → How do I achieve vibrant pastel swirls?
Divide the dough into portions and tint each with gel food coloring. Roll into long ropes and gently twist to combine colors evenly without overmixing.
- → Can I skip chilling the dough?
Chilling firms the dough, making it easier to slice and helping cookies bake evenly with better shape retention.
- → What type of food coloring is recommended?
Gel food coloring is ideal as it provides vibrant hues without altering dough consistency.
- → How should I store the cookies after baking?
Store cooled cookies in an airtight container at room temperature for up to five days to maintain freshness.
- → Can I add extra flavor to the dough?
Yes, adding lemon or orange zest enhances flavor and complements the buttery sweetness.