 Save
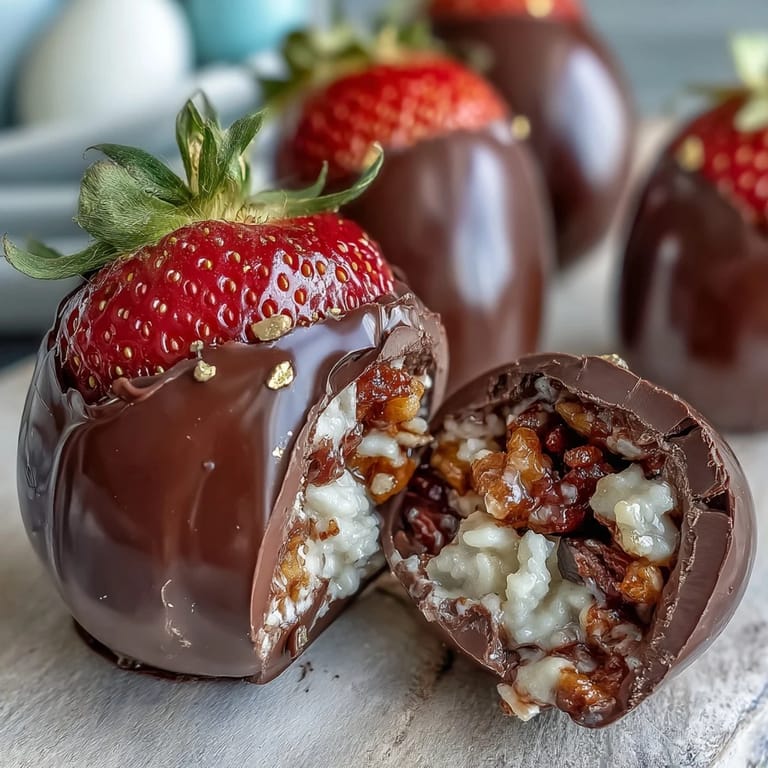
Save Last spring, I was scrolling through Dubai luxury chocolate shops online when I stumbled upon these impossibly elegant Easter eggs with crispy, jewel-toned shells. They looked like something out of a high-end patisserie, yet the technique seemed almost playful once I understood it. That afternoon, I gathered my supplies and discovered that making them at home wasn't intimidating at all—just methodical, rewarding, and surprisingly fun. Now every Easter, my kitchen smells like melted chocolate and strawberries, and these eggs become the centerpiece everyone asks about.
I made these for my partner's family gathering last year, and watching their faces light up when they cracked into one was genuinely magical. My mother-in-law immediately asked if I'd considered selling them, which was flattering but also funny because I was still figuring out the seal technique. The moment that stuck with me, though, was when my nephew—usually glued to his phone—put down everything to savor one slowly, savoring every layer.
Ingredients
- High-quality white chocolate (300 g): This is the skeleton of your eggs, so don't skimp on quality—cheap chocolate can be waxy and won't set with that beautiful glossy finish you're aiming for.
- Freeze-dried strawberry powder (1 tbsp): This gives authentic strawberry flavor without adding moisture that can crack your shells; it's truly the secret to color that stays vibrant.
- Red or pink food coloring (optional): Just a tiny drop goes a long way—I learned this the hard way by making hot pink eggs that looked more neon than elegant.
- Milk chocolate (80 g): This balances the sweetness of the filling and pairs gorgeously with hazelnut.
- Hazelnut spread (70 g): Use the real stuff or quality versions; it's the backbone of your filling's flavor.
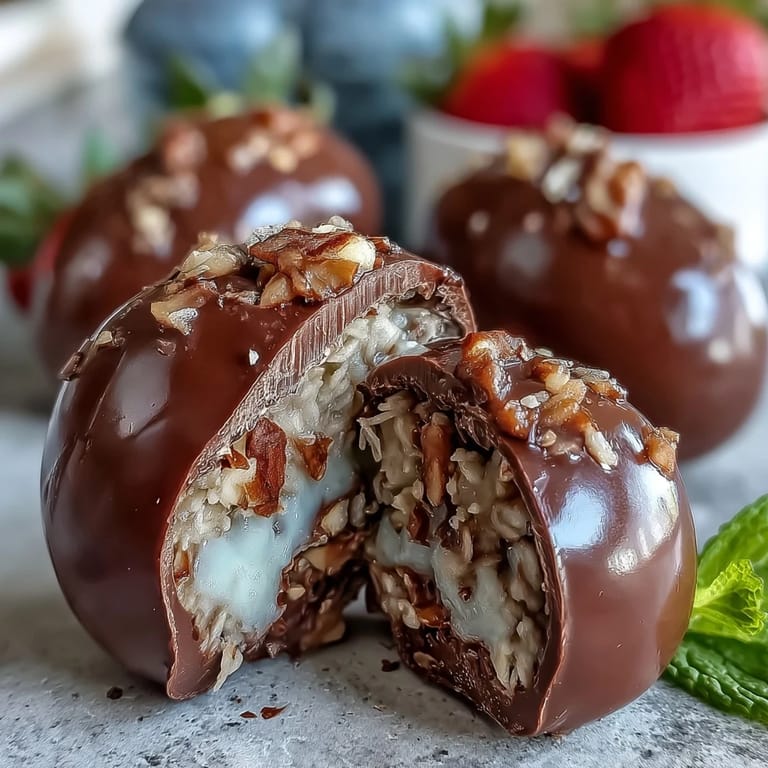
- Crisped rice cereal (40 g): This gives that magical crunch that makes people say 'wow' when they bite in.
- Roasted hazelnuts, chopped (30 g): Toast them yourself if you can—the aroma alone is worth it, and the flavor is deeper than pre-roasted.
- Vanilla extract (1/2 tsp): A small amount lifts the entire filling, making it taste less one-dimensional.
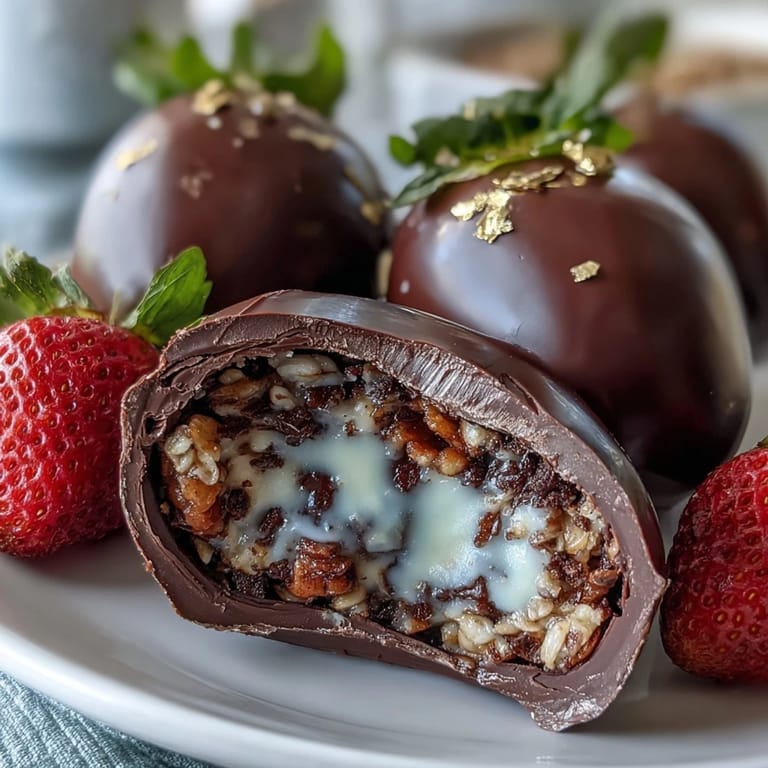
- Edible gold leaf (optional): For when you want to feel fancy, which should be always.
Tired of Takeout? 🥡
Get 10 meals you can make faster than delivery arrives. Seriously.
One email. No spam. Unsubscribe anytime.
Instructions
- Melt your white chocolate gently:
- Use a double boiler or microwave in 20-second bursts, stirring between each one—this prevents the chocolate from seizing into a grainy mess. Once it's completely smooth, stir in your strawberry powder and a whisper of food coloring, mixing until the color is even and there are no streaks.
- Build your shells with patience:
- Using a pastry brush or the back of a teaspoon, coat the inside of each silicone mold with a thick layer of strawberry chocolate, working carefully into corners. Chill for 10 minutes, then repeat the layer—this double coating ensures your shells are sturdy enough to hold the filling without cracking.
- Prepare the crunch filling:
- Melt your milk chocolate, then stir in hazelnut spread and vanilla until glossy. Fold in the crisped rice and chopped hazelnuts gently so the cereal stays intact and crunchy—this is where you'll get those satisfying bite moments.
- Fill with intention:
- Spoon or pipe the filling into each chilled chocolate shell, leaving a small border around the edges so the seal has somewhere to grip. Chill for 10 minutes so the filling sets just enough to support the top without squishing out.
- Seal your creations:
- Take the second half of each shell and very gently warm the edges—just run it near a warm surface or briefly over warm water. Press it onto the filled base with gentle pressure, holding for a moment so it adheres.
- Finish with flourish:
- If there are visible seams, smooth them with a little melted chocolate on a fine brush or just leave them rustic—honestly, that's part of the charm. Add gold leaf or white chocolate drizzles, then refrigerate until serving time.
 Save
Save There's something almost ceremonial about these eggs, something that transforms a simple chocolate dessert into a gift that people actually treasure. I keep a photo of one broken open, showing the layers inside, because it reminds me that the best things taste even better than they look.
Working with Silicone Molds
Silicone molds are forgiving friends in the kitchen, but they do benefit from being chilled before you use them—a cold mold helps chocolate set faster and more evenly. I always pop mine in the freezer for 5 minutes while I'm melting the chocolate, which sounds fussy but genuinely changes how quickly you can move through the process. One afternoon I forgot to chill them, and the chocolate took twice as long to set, which threw off my whole timing and taught me that these tiny details matter.
Flavor Variations Worth Trying
Once you master the basic technique, the filling combinations become your playground. I've made versions with dark chocolate and raspberry powder, white chocolate with pistachio paste, and even a boozy version with a hint of hazelnut liqueur that's absolutely decadent. The strawberry-hazelnut combination feels timeless, but there's genuine joy in experimenting once you understand how the layers work together. Think of the shell as your canvas and the filling as your signature.
Storage and Serving Wisdom
These eggs are best served cold straight from the refrigerator, when the chocolate is snappy and the filling stays crisp. They'll keep beautifully for about a week in an airtight container in the fridge, though honestly, they rarely last that long in my house. For gifting, I've found that placing them in small paper cups inside a nice box creates that boutique presentation that makes people feel like they've received something truly special.
- Keep them chilled until the moment before serving so all those textures stay defined and perfect.
- If you're making these ahead for an event, prepare them two or three days early so you can actually enjoy the party instead of rushing in the kitchen.
- Wrap individual eggs in tissue paper or parchment for gifting—the presentation matters as much as the taste.
 Save
Save These eggs remind me that Easter, and honestly life in general, tastes better when you slow down and make something with your hands. They're fancy enough to impress, simple enough to enjoy making, and delicious enough that you'll want to repeat the whole process next year.
Recipe FAQ
- → How do I achieve a smooth chocolate shell?
Melt white chocolate gently over a double boiler or in short microwave bursts, stirring often to prevent overheating. Adding strawberry powder evenly distributes flavor and color.
- → What can I substitute for hazelnuts in the filling?
For nut-free versions, swap hazelnuts with sunflower seed butter and omit chopped hazelnuts to maintain texture.
- → How long should I chill the molded eggs?
Chill each chocolate layer for about 10 minutes before applying the next, then refrigerate the set shells for 15 minutes to firm up.
- → Can different chocolates be used for variation?
Yes, dark or ruby chocolate can replace white or milk chocolate for a unique flavor twist.
- → What tools are needed to make these eggs?
Essential tools include silicone egg molds, a double boiler or microwave for melting chocolate, a pastry brush or teaspoon for coating, and mixing bowls.