 Save
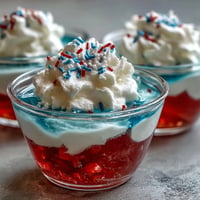
Save My friend texted me three weeks before graduation asking if I could bring something special to the celebration dinner. I was standing in my kitchen, staring at a half-empty pantry, when it hit me—tiny cheesecakes with little diploma picks. Something that felt fancy but wouldn't stress me out hours before the party. That's when these buttery, creamy bites became my go-to move for marking big moments.
The night before that graduation party, I was stress-testing the recipe in my small apartment kitchen. My roommate came home to find me pulling warm cheesecakes from the oven, and the smell—that vanilla and butter aroma mixed with graham cracker—made her stop in her tracks. She grabbed one still warm from the pan before it could even cool, and I knew right then these would be a hit.
Ingredients
- Graham cracker crumbs (1 cup): Don't buy the pre-crushed box if you can help it; pulse whole crackers yourself so you get a mix of fine and slightly chunky pieces that pack down better.
- Granulated sugar (2 tbsp for crust, 1/2 cup for filling): Keep separate—you'll need both amounts and mixing them at once leads to overbaked crusts.
- Unsalted butter (4 tbsp, melted): Melted butter makes the crust mixture come together instantly; cold butter creates clumps.
- Cream cheese (12 oz, softened): Leave it on the counter for 30 minutes before using; cold cream cheese creates lumps that won't blend smooth no matter how hard you beat it.
- Large egg (1): Room temperature works best, and this single egg is what sets these from falling apart; don't skip it.
- Vanilla extract (1 tsp): Real vanilla makes a noticeable difference in such a simple filling.
- Sour cream (2 tbsp): This is the secret to keeping the centers tender and preventing the tops from cracking.
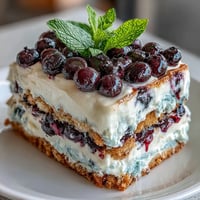
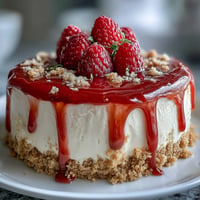
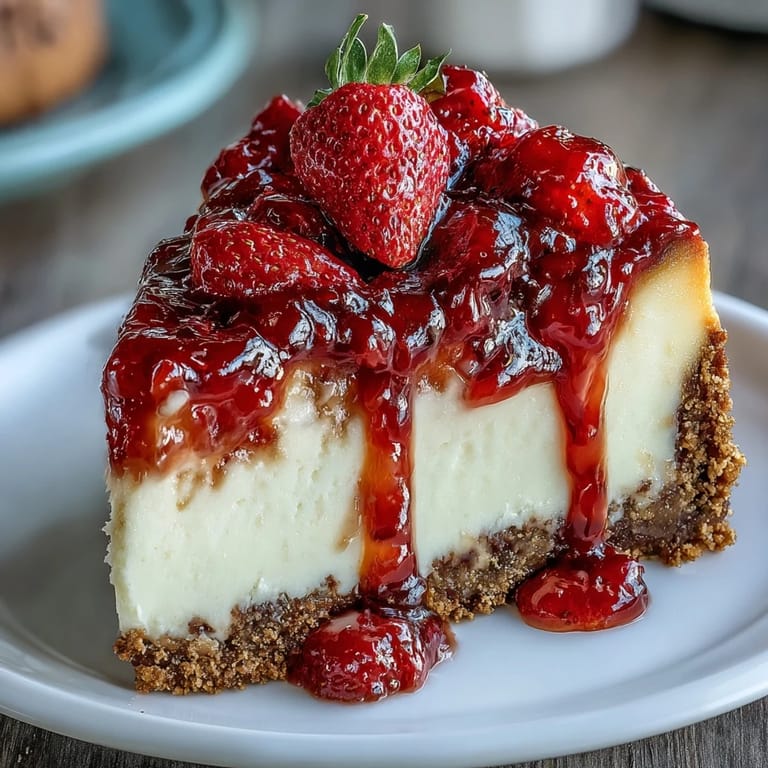
- Fresh mixed berries (1/2 cup, diced): Blueberries, raspberries, or strawberries work, but choose whatever is ripe and juicy—that brightness on top is what makes them feel celebratory.
- Fruit preserves (2 tbsp, optional): The gloss makes them shine for photos, but honestly they're beautiful without it.
- Diploma picks: Found online or in party supply sections; you can also twist kraft paper around toothpicks if you're in a pinch.
Tired of Takeout? 🥡
Get 10 meals you can make faster than delivery arrives. Seriously.
One email. No spam. Unsubscribe anytime.
Instructions
- Prep your pans and preheat:
- Set your oven to 325°F and line a 24-cup mini muffin pan with paper liners—this temperature is lower than you might expect, but it keeps these little cakes from browning too fast on top while staying dense inside. Think of it as a gentle hug from the oven.
- Build the crust base:
- Toss your graham cracker crumbs with sugar and melted butter until it looks like wet sand. Spoon about a teaspoon into each liner and press down firmly with your thumb or the back of a measuring spoon—you want it compact so it doesn't crumble when you bite through.
- Toast the crusts:
- Bake for 5 minutes until they turn golden and smell incredible, then let them cool for just a moment. This quick bake sets everything in place before the filling goes in.
- Blend the filling until silky:
- Beat your softened cream cheese and sugar together with an electric mixer until it's completely smooth and light, about 2 minutes. Add the egg, vanilla, and sour cream, then mix just until combined—overmixing incorporates too much air and causes cracks.
- Fill and bake:
- Spoon about a tablespoon of filling into each liner on top of the crust, smoothing the tops gently with the back of the spoon. Bake for 13 to 15 minutes until the edges are set but the centers still jiggle slightly when you tap the pan—that jiggle is what keeps them creamy.
- Cool in stages:
- Let them sit in the pan for 15 minutes so they can firm up without shocking their system by moving too soon. Transfer to a wire rack and let them cool completely before chilling.
- Chill and set:
- Refrigerate for at least an hour, though overnight is even better. Cold cheesecakes are firmer and easier to top without the filling sliding everywhere.
- Top with berries and shine:
- Scatter a few fresh berries on top of each bite. If you're using preserves for that professional look, warm them slightly and brush lightly over the berries—you're aiming for a gentle shine, not a glaze.
- Add the celebration touch:
- Slide a diploma pick into each cheesecake bite just before serving. This is the moment they transform from dessert into a centerpiece.
 Save
Save At the graduation party, I watched someone take their first bite, see the diploma pick, and actually smile. They bit into that creamy center with the crisp crust underneath and just closed their eyes for a second. That's the moment I realized these weren't just cheesecakes—they were tiny edible bookmarks in someone's big day.
Flavor Variations to Try
Once you nail the basic recipe, these bites become a canvas for experimentation. I've added lemon zest to the filling for a bright, summery version that pairs perfectly with raspberry toppings, and another time I swirled a tiny bit of melted chocolate into the cream cheese mixture before baking. The beauty of mini cheesecakes is that you can bake half a batch one way and half another, so you're not committing to a single flavor.
Storage and Make-Ahead Tips
These actually get better after a day in the refrigerator because the flavors settle and the texture becomes even creamier. Keep them in an airtight container and they'll last up to three days, which means you can make them the day before a party and spend your time on other things. If you want to freeze them, skip the berry toppings and add those fresh right before serving—they'll stay fresh in the freezer for up to two weeks.
Customizing for Your Celebration
The diploma picks are what make these feel special for graduation, but you can swap them for anything that matches your occasion. I've used tiny hearts for Valentine's Day, little flags for summer parties, and even personalized toothpicks with names written in edible marker for a bridal shower. The skeleton of the recipe stays the same, but the presentation is completely up to you.
- For a gluten-free crowd, swap regular graham crackers for gluten-free versions—the ratio stays exactly the same.
- If you can't find fresh berries or they're not ripe, a drizzle of berry jam or even a tiny dollop of whipped cream works beautifully.
- Make sure your cream cheese is truly softened or you'll end up with a lumpy filling that no amount of mixing can fix.
 Save
Save These cheesecake bites have become my signature move for celebrations, and every time I make them, I think about that graduation party and my roommate stealing one warm from the oven. They're proof that sometimes the fanciest-looking desserts are actually the simplest to pull off.
Recipe FAQ
- → What type of crust is used for these cheesecake bites?
A buttery graham cracker crust provides a crunchy base for the creamy filling.
- → How long should the bites be chilled before serving?
Chill the cheesecake bites for at least one hour to allow the filling to set properly.
- → Can the crust be made gluten-free?
Yes, using gluten-free graham cracker crumbs works well as a substitute for a gluten-free option.
- → How can I add extra flavor to these bites?
Try incorporating lemon zest or a swirl of chocolate into the filling for added flavor complexity.
- → What is the purpose of the diploma picks?
Diploma picks add a festive, decorative touch ideal for graduation celebrations.
- → How should the cheesecake bites be stored?
Store them refrigerated in an airtight container for up to three days to keep them fresh.