 Save
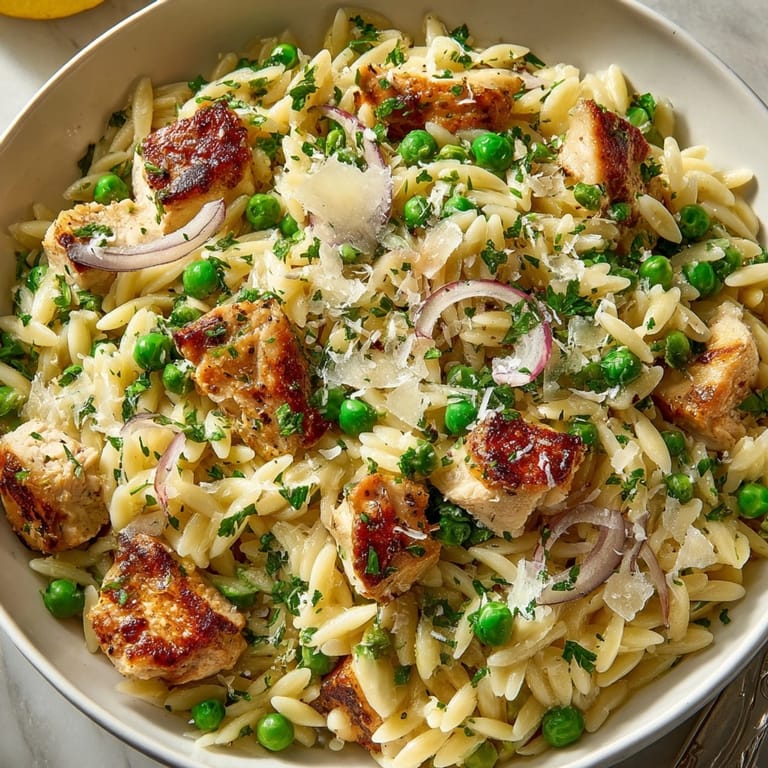
Save This one-pot buttery garlic chicken orzo with peas has become my weeknight dinner hero, combining creamy pasta, tender chicken, and sweet peas in a single skillet for maximum flavor with minimal cleanup.
I first created this dish during a particularly busy week when I needed something satisfying but simple. The combination of buttery orzo and garlic-infused chicken was such a hit that it's now in our regular dinner rotation, especially on those nights when comfort food is calling.
Ingredients
- Boneless skinless chicken breasts or thighs: create the protein foundation for this dish. I prefer thighs for their richer flavor and juiciness that stands up well to the cooking process.
- Unsalted butter: provides a rich, velvety base. Using unsalted lets you control the final seasoning level perfectly.
- Fresh garlic cloves: offer aromatic depth that dried simply cannot match. Mince them finely for even distribution throughout the dish.
- Orzo pasta: absorbs flavors beautifully while maintaining a pleasant texture. Look for quality orzo that holds its shape when cooked.
- Low sodium chicken broth: forms the flavorful cooking liquid. The lower sodium content allows you to adjust seasoning to your preference.
- Frozen peas: add color, sweetness and nutrition. No need to thaw them first as they heat quickly in the hot pasta.
- Parmesan cheese: contributes savory umami notes and helps create the creamy texture. Always grate fresh from a block for best flavor.
- Fresh parsley and lemon zest: brighten the rich flavors with their citrusy, herbaceous notes. These finishing touches elevate the entire dish.
Tired of Takeout? 🥡
Get 10 meals you can make faster than delivery arrives. Seriously.
One email. No spam. Unsubscribe anytime.
Instructions
- Season the Chicken:
- Thoroughly coat your chicken pieces with salt and pepper, ensuring even distribution. This initial seasoning is crucial as it forms the flavor foundation for the protein component of the dish. Let the seasoned chicken sit for about 5 minutes to absorb the seasonings while you prepare other ingredients.
- Create the Flavor Base:
- Heat your skillet over medium high heat until you can feel warmth radiating when you hold your hand above it. Add butter and olive oil, allowing them to melt together until the butter stops foaming. The oil prevents the butter from burning while maintaining that rich butter flavor. Add the chicken pieces in a single layer without overcrowding to ensure proper browning rather than steaming.
- Develop the Aromatics:
- After removing the chicken, add the remaining butter to the same pan, capturing all those flavorful brown bits left behind. Add onions and cook until they become translucent and slightly golden at the edges, stirring occasionally. When adding garlic, reduce heat slightly to prevent burning and stir constantly for that one minute to release its aromatic oils without developing bitterness.
- Toast the Orzo:
- Add the dry orzo directly to the aromatics and stir constantly for the full 2 minutes. This crucial toasting step creates a nutty flavor profile and helps the pasta maintain its texture during the simmering process. You should notice the orzo turning slightly golden in spots.
- Create the Creamy Base:
- Pour in the broth and milk simultaneously, stirring immediately to prevent the milk from separating. Use your spoon to scrape all the flavorful brown bits from the bottom of the pan. These caramelized bits dissolve into the liquid, adding remarkable depth to the final dish.
- Simmer to Perfection:
- Maintain a gentle simmer rather than a rolling boil to prevent the orzo from sticking to the bottom. Stir every 2 3 minutes, making sure to scrape the bottom of the pan. The orzo will gradually absorb the liquid while releasing its starches, naturally creating a creamy consistency. Test for doneness at the 10 minute mark by tasting a piece of orzo.
- Incorporate Final Elements:
- Return the chicken to the pan along with the frozen peas, stirring gently to distribute evenly without breaking up the chicken pieces. The residual heat will warm the chicken and cook the peas to bright green perfection without making them mushy.
- Finish with Fresh Accents:
- Remove the pan from heat completely before adding the Parmesan, parsley and lemon zest. The residual heat will melt the cheese while preserving the bright flavors of the fresh herbs and citrus. Stir just until incorporated, taste, and adjust seasoning with additional pepper as needed.
 Save
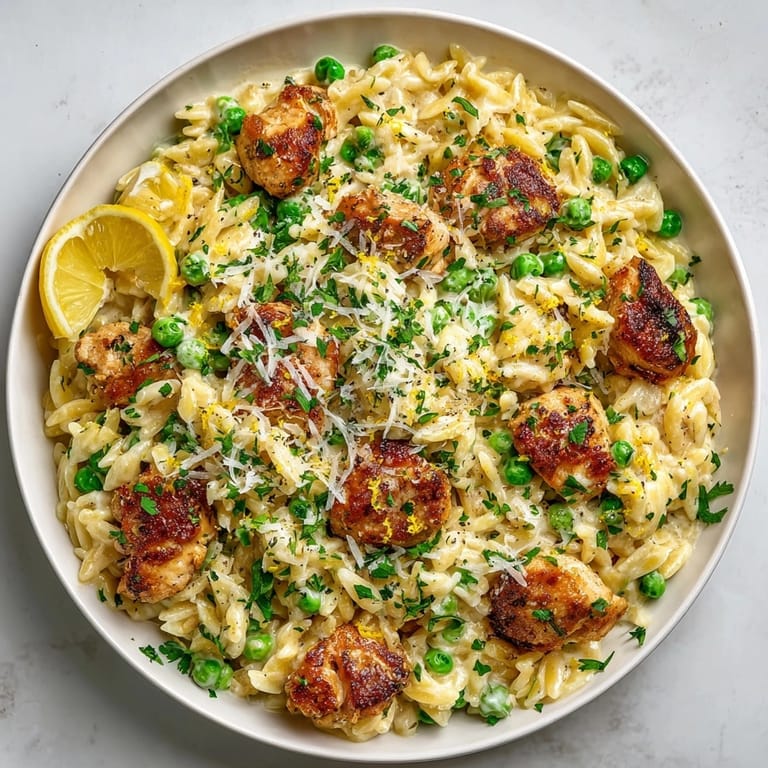
Save The lemon zest is my secret weapon in this recipe. I discovered its transformative power by accident when I had a lemon on its last legs in the fruit bowl. That bright citrus note cuts through the richness perfectly, making all the other flavors sing. My family now notices immediately if I forget to add it.
Storage and Reheating
This dish keeps beautifully in an airtight container in the refrigerator for up to 4 days. The orzo will continue to absorb liquid as it sits, so when reheating, add a splash of chicken broth or water to restore the creamy consistency. Heat gently on the stovetop over medium low heat, stirring frequently, or microwave in 30 second intervals, stirring between each until heated through. The texture remains remarkably good compared to many pasta dishes that can become mushy when reheated.
Creative Variations
Transform this basic recipe by experimenting with different flavor profiles. For a Mediterranean twist, add halved cherry tomatoes, chopped artichoke hearts, and a sprinkle of crumbled feta instead of Parmesan. Create an herb garden version by incorporating fresh basil, thyme, and a dollop of pesto at the end. For a heartier autumn variation, substitute diced butternut squash for the peas and add a pinch of sage and nutmeg. The basic technique remains the same while these simple swaps create entirely new dishes from the same foundation.
Make Ahead Tips
This dish works wonderfully as a make ahead option with a few adjustments. Prepare the recipe through step 6, but undercook the orzo slightly by about 2 minutes. Let cool completely before refrigerating. When ready to serve, transfer to a baking dish, add an extra 1⁄2 cup of broth, cover with foil, and bake at 350°F for about 20 minutes. Then stir in the peas, chicken, cheese and fresh herbs. This method prevents the orzo from becoming overcooked or mushy when reheated.
Troubleshooting Common Issues
If your orzo seems too dry during cooking, simply add additional broth or water in 1⁄4 cup increments. The final consistency should be creamy but not soupy. If the mixture becomes too thick after adding the Parmesan, a splash of warm broth will loosen it perfectly. For those who find their orzo sticking to the bottom of the pan, reduce heat further and stir more frequently during the simmering process. A heavy bottomed pan also helps distribute heat more evenly to prevent sticking.
 Save
Save For maximum flavor development, season at every stage rather than just at the end. Use the cooking time listed as a guideline only, as different brands of orzo may require slightly different cooking times. When adding the Parmesan, sprinkle it gradually while stirring to ensure it melts evenly without clumping.
Recipe FAQ
- → Can I use chicken thighs instead of breasts?
Yes, both chicken thighs and breasts work well. Thighs provide extra juiciness and flavor.
- → How do I prevent the orzo from sticking?
Stir the orzo occasionally during simmering and ensure enough liquid is available throughout cooking.
- → Can I make this dish ahead of time?
Yes, but for best texture, reheat gently with a splash of broth or milk to loosen the orzo.
- → What can I use instead of peas?
Try baby spinach, chopped asparagus, or even diced zucchini for a different spin.
- → Is this suitable for a nut-free diet?
Yes, this meal is naturally nut-free. Always confirm ingredients are processed in nut-free facilities.
- → What pairs well with this dish?
A crisp green salad and Sauvignon Blanc or Chardonnay complement the creamy, savory flavors perfectly.